DRYな備忘録

Don't Repeat Yourself.

【Xcode】/usr/lib/swift/libswiftCore.dylib: mach-o, but not built for iOS simulator

問題

UITest実行時に、以下のエラーが出てテストがコケる。

2020-02-26 15:34:47.656498+0200 ExampleUITests-Runner[2134:4937234] +[CATransaction synchronize] called within transaction
2020-02-26 15:34:47.665527+0200 ExampleUITests-Runner[2134:4937234] Running tests...
2020-02-26 15:34:47.690928+0200 ExampleUITests-Runner[2134:4937234] The bundle “ExampleUITests” couldn’t be loaded because it is damaged or missing necessary resources. Try reinstalling the bundle.
2020-02-26 15:34:47.691036+0200 ExampleUITests-Runner[2134:4937234] (dlopen_preflight(/Users/hiromu/Library/Developer/Xcode/DerivedData/Example-cfyafhhbbnwfizglyzbfwoouudes/Build/Products/Debug-iphonesimulator/ExampleUITests-Runner.app/PlugIns/ExampleUITests.xctest/ExampleUITests): Library not loaded: /usr/lib/swift/libswiftCore.dylib
  Referenced from: /Users/hiromu/Library/Developer/Xcode/DerivedData/Example-cfyafhhbbnwfizglyzbfwoouudes/Build/Products/Debug-iphonesimulator/ExampleUITests-Runner.app/PlugIns/ExampleUITests.xctest/ExampleUITests
  Reason: no suitable image found.  Did find:
    /usr/lib/swift/libswiftCore.dylib: mach-o, but not built for iOS simulator)

環境

調査

$ ls -la /usr/lib/swift/libswiftCore.dylib
-rwxr-xr-x  1 root  wheel  6698944  7 29  2019 /usr/lib/swift/libswiftCore.dylib

dylibは、たしかに有る。but not built for iOS simulatorとあるので、UITestのために使用しているiOS simulatorのバージョンを変えればいいのだろうか?プロジェクトのビルドターゲットがiOS 12.0+なので、12.0などを使っていたが、いろいろ試して

通った。

とりあえず結論

なので、プロジェクトのビルドターゲットに関わらず、使っているXcodeがサポートしているiOSのバージョンのSimulatorのlibswiftCore.dylibしかないよ、ということなのだと思う。さもありなん、という感じ。

Xcode 11 で iOS 12.0 上のUITestをしたい

// TODO: こんどかく

NOT DRY YET

【iPhone】No such module 'RxSwift'

問題

pod installRxSwiftをインポートしたつもりだが、ViewControllerでimport RxSwiftとすると、

No such module 'RxSwift'

f:id:otiai10:20200223203143p:plain

となり、もちろんビルドもRunもできない。

解決

.xcodeprojではなく、.xcworkspaceから開く。

自分の場合は、ターミナルからopen MyTestProject.xcworkspaceと打って開いた。

雑感

  • エジプト、メシが不味い

DRY

【iPhone】【Safari】getUserMediaで取ったMediaStreamをvideoタグにセットしても最初のフレームだけ描画されて止まってしまう問題【React】

問題

  • iPhoneSafariにおいて、
  • navigator.mediaDevices.getUserMediaによって、
  • videoを含むMediaStreamを取得し、
  • HTMLのvideoタグに動画を描画しようとすると、
  • 最初のフレームだけ描画されたのち、フリーズしてしまう。

解決

getUserMediaを呼ぶ前に、videoタグにautoplay, muted, playsinline属性が付与されている必要がある。

stackoverflow.com

その他の注意

  • Reactのjsxないしtsxファイルにおいて、<video playsinline={true} />とした場合でも、最終的にレンダリングされたHTMLにその属性が付与されているか確認すること
    • されてなかったので、わざわざRefObjectつくってDOMのAPIからsetAttribute('playsinline', '')などとした
  • そもそもgetUserMediasecure context と呼ばれるウェブページにおいてのみ動作するため、HTTPSを使ったページにホストする必要がある

参考

雑感

  • 1日ハマった

DRYな備忘録として

iOSでFontAwesomeを使う【Xcode10.3】

Xcodeは変化が早いので日付に注意してください

ゴール

  • XcodeiOSプロジェクトでFontAwesomeが使える

参考

要素

  1. FontAwesomeのOTFファイルを入手する
  2. FontAwesomeのOTFファイルをXcodeプロジェクトに追加する
  3. 使ってみる

FontAwesomeのOTFファイルを入手する

fontawesome.com

今回欲しいのはOTFファイルなので、for DesktopのほうをDownloadします。

f:id:otiai10:20190808140812p:plain
ダウンロードして解凍したもの

FontAwesomeのOTFファイルをXcodeプロジェクトに追加する

ここに懇切丁寧に解説があるが、 Adding a Custom Font to Your App | Apple Developer Documentation

要素としては、

  1. 今後のためにfontsGroupをつくっておく
  2. ハードコピーを作成しつつotfファイルを追加する
  3. info.plistで、Fonts provided by applicationを追加する

f:id:otiai10:20190808141402p:plain
info.plist における Fonts provided by application の item の名前は、ファイル名から拡張子`.otf`を除いたものとした

使ってみる

f:id:otiai10:20190808142827p:plain

雑感

  • 意外とかんたんだった

DRYな備忘録として

【iOS】ボタン長押しの実装【Xcode10.3】【Swift5】

Xcodeは変化が早いので記事の日付に注意してください

ゴール

  • 長押ししてアラートとか出るボタンを設置する

tl;dr

override func viewDidLoad() {
    super.viewDidLoad()
    let recognizer = UILongPressGestureRecognizer(target: self, action: #selector(onLongPress))
    self.button.addGestureRecognizer(recognizer)
}

@objc func onLongPress() {
    let alert = UIAlertController(title: "Long Press", message: "親父にも長押しされたことないのに!", preferredStyle: .alert)
    alert.addAction(UIAlertAction(title: "OK", style: .default, handler: nil))
    self.present(alert, animated: true, completion: nil)
}

以下読まなくていいです。

1. ボタンの設置・追加

最近のXcodeはオブジェクトの追加をするペインが無い。Cmd + Shif + Lで、かつてオブジェクト選択のペインだったものがダイアログとして出てくる。

f:id:otiai10:20190808105440p:plain
Cmd + Shift + L

ここで、ButtonをStoryboardにドラッグアンドドロップして、適当にテキスト変えて、終了。

f:id:otiai10:20190808105756p:plain

2. 通常のTouchイベントの登録

Storyboardを表示した状態で、右上の「◯◯」を押すと、Storyboardに紐付いているViewControllerが反面に開かれる。

f:id:otiai10:20190808110042p:plain

で、ButtonとViewControllerを紐付ける。

f:id:otiai10:20190808110925p:plain

ちょっとAlert出すコード書く。

@IBAction func onTouchDownButton(_ sender: Any) {
    let alert = UIAlertController(title: "Touch Down", message: "押したねっ", preferredStyle: .alert)
    alert.addAction(UIAlertAction(title: "close", style: .default, handler: nil))
    self.present(alert, animated: true, completion: nil)
}

こうなる

f:id:otiai10:20190808112127g:plain

3. 長押しのRecognizerを設置

とりあえずさっき作って紐付けたTouch Downイベントは消して、以下のようなコードを書く。

このとき、self.buttonは、上記のような要領で、Ctrl押しながらUIパーツをViewControllerにひっぱってきて置いたもの。

override func viewDidLoad() {
    super.viewDidLoad()
    let recognizer = UILongPressGestureRecognizer(target: self, action: #selector(onLongPress))
    self.button.addGestureRecognizer(recognizer)
}

// func onLongPress(_ sender: UILongPressGestureRecognizer) {
@objc func onLongPress() {
    let alert = UIAlertController(title: "Long Press", message: "親父にも長押しされたことないのに!", preferredStyle: .alert)
    alert.addAction(UIAlertAction(title: "OK", style: .default, handler: nil))
    self.present(alert, animated: true, completion: nil)
}

こうなる

f:id:otiai10:20190808114936g:plain

雑感

  • Xcodeは補完がきもちいいですね
  • Swiftはguardが好きです
  • iOS開発たのしい

DRYな備忘録として

任意のURL(に限らず文字列)のQRコードをコマンドラインで生成する

という文言でググればいくらでも出てきますけど。

tl;dr

% pip install segno
% segno "https://before11.hatenablog.com/" --output myblog.png --scale 8

そしたらこういう画像が myblog.png として得られる

f:id:otiai10:20190625135536p:plain

おしまい

ログ

% pip install segno
DEPRECATION: Python 2.7 will reach the end of its life on January 1st, 2020. Please upgrade your Python as Python 2.7 won\'t be maintained after that date. A future version of pip will drop support for Python 2.7.
You are using pip version 19.0.3, however version 19.1.1 is available.
You should consider upgrading via the 'pip install --upgrade pip' command.

# アアアッ、すみません

% which pip
/Users/otiai10/.venv/default/bin/pip

# venv使っててこれかよ

% cd ~
% rm -rf .venv
% mkdir ~/.venv
% cd .venv
% virtualenv create default -p /usr/local/bin/python3
% source ./default/bin/activate
% which pip
/Users/otiai10/.venv/default/bin/pip
% python -V
Python 3.6.8

# オッケ

% pip install segno
% segno --help
% segno "https://before11.hatenablog.com/" -o myblog.png
% gat myblog.png

# 小せえ!

% segno "https://before11.hatenablog.com/" -o myblog.png --scale 8
% gat myblog.png

# いい感じ

ついでなので上記のログに出てきた gat を紹介させてください。

github.com

DRYな備忘録として

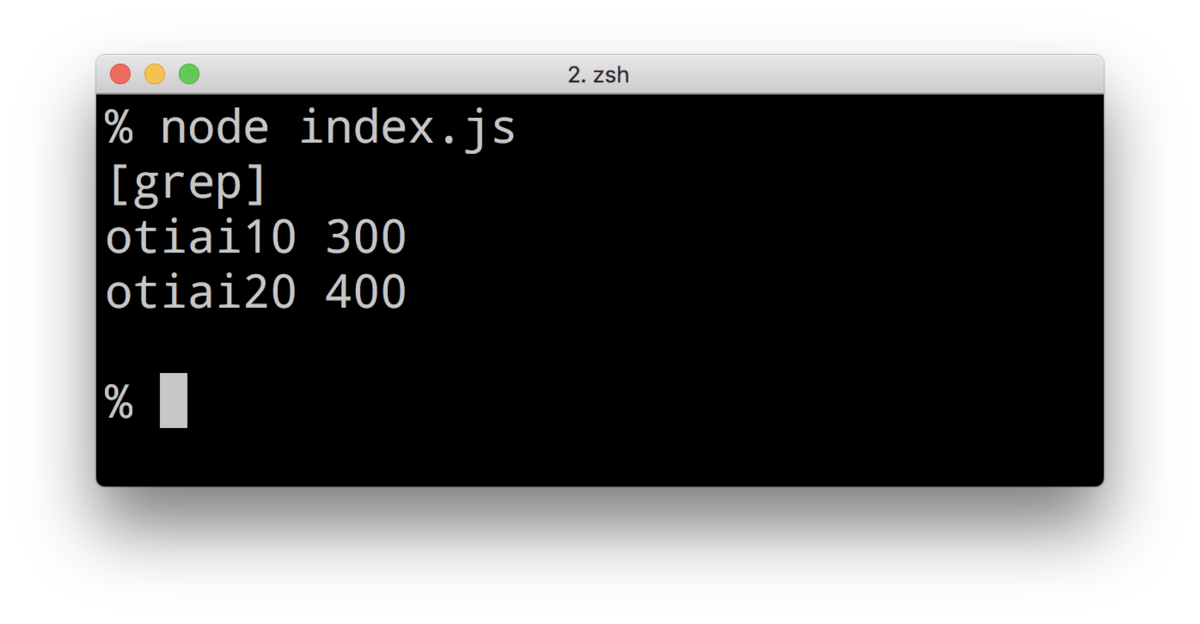
Node.jsのchild_process間で、標準出力のpipe

これをやりたい↓

cat ./testdata.txt | grep otiai

JavaScriptで、

const cat = spawn('cat', ['./testdata.txt']);
const grep = spawn('grep', ['otiai']);
cat.stdout.pipe(grep.stdin);
grep.stdout.on('data', (chunk) => {
    console.log('[grep]');
    console.log(chunk.toString());
});

f:id:otiai10:20190530121345p:plain

おわりです。うごくやつです。

github.com

DRYな備忘録として

Node.jsデザインパターン 第2版

Node.jsデザインパターン 第2版

Node.js超入門[第2版]

Node.js超入門[第2版]

はじめてUNIXで仕事をする人が読む本

はじめてUNIXで仕事をする人が読む本