DRYな備忘録

Don't Repeat Yourself.

Mac上で「歌声りっぷ」を使う【Boot Camp】【Windows10】

背景

  • ある曲のボーカルを抽出したものが欲しい(公式のオフボーカルは手元にある)
    • Ableton Live でオフボーカルトラックの逆位相をオリジナルトラックにぶつける方法でボーカルを抽出しようとした
      • あんまりうまくいかない
    • PhonicMind で1曲だけ利用枠購入してボーカルを抽出しようとした
      • 曲調によってはうまくいく
  • Macだけど「歌声りっぷ」も使ってみて、品質を比較したい

※ 本エントリ末尾に、実際に聞ける形で結果の比較があります。

概要

  1. MacBoot Campで、Windows10を使えるようにする
    1. Windows10のプロダクトキーをAmazonで購入しとく
    2. Windows10のISOファイルをダウンロードする
    3. Windows10のインストールと起動+初期化
  2. MacWindowsを選択的に起動する
    1. 電源オフ状態 → Mac / Windows の選択
    2. Mac起動時 → Windows
    3. Windows起動時 → Mac
  3. 「歌声りっぷ」を利用可能な状態にする
    1. ソースのダウンロードとlzhの解凍
  4. 「歌声りっぷ」の使用
    1. 16bitのwavでなければいけない
    2. 実行!

手順の記録

1. MacBoot Campで、Windows10を使えるようにする

1-a. Windows10のプロダクトキーをAmazonで購入しとく

箱でも変えるっぽいけど、オンラインコードで買ったほうがいろいろ楽だと思われ。僕はこちらをポチった。金無いけど。

購入が完了して「注文履歴」→「注文の詳細」で「ライブラリに移動」すると、プロダクトキーが表示されてる。

f:id:otiai10:20181019151248p:plain

f:id:otiai10:20181019151947p:plain

このプロダクトキー、携帯のカメラなりでメモっとくのがいいです。1-cでWindowsをアクティベートするとき、当然ながらこの画面をこのPCで開く術が無いのでw

1-b. Windows10のISOファイルをダウンロードする

上記で購入したものは、Windowsをマシンにインストールしてアクティベートするときに必要な「プロダクトキー」であり、WindowsのOSそのものではないので、OSのソースコードをダウンロードしてくる必要があります。まあまあデカい。

1-c. Windows10のインストールと起動+初期化

Boot Camp Assistant」という標準でMacに入ってるアプリケーションを使って、上記でダウンロードできたWindows10のISOファイルを元に、Windows10をこのマシンにインストールする。必要なソフトウェアのダウンロードなどを含むので、ある程度太い回線につないで実行するのがよいかと思われます。

f:id:otiai10:20181019154341p:plain

インストールが終わると、Windowsでの再起動を提案されるので、Yesです。

Windowsが立ち上がり、言語やキーボードレイアウトなどを聞かれたのち、プロダクトキーを入力する場面になるが、それはもう1-aで購入しているので、それを使う。

f:id:otiai10:20181019155155p:plain

2. MacWindowsを選択的に起動する

2-a. 電源オフ状態 → Mac / Windows の選択

support.apple.com

以上。

2-b. Mac起動時 → Windows

support.apple.com

以上。

2-c. Windows起動時 → Mac

これが問題で、ほんまは「右下の△」→「ひし形マーク」→「OS Xでの再起動」を選択したらBootCampできるらしんだけど、macOS High Sierra からどうやらそれが動かないらしいので、

2-aと同じ方法を取る、つまり一度シャットダウンするよりほかなさそう。

参考: itkhoshi.com

3.「歌声りっぷ」を利用可能な状態にする

無事、MacでWindows10が動くことが確認できたので、つぎに「歌声りっぷ」を調達する。

3-a. ソースのダウンロードとlzhの解凍

ソースそのものはここでダウンロード可能

www.vector.co.jp

ただ、落としてきたものがlzhファイルで、この解凍ソフトウェアがデフォルトで入っていないので、

forest.watch.impress.co.jp

これを落としてきて、ショートカットをデスクトップに作成して、そこに「歌声りっぷ」のlzhファイルをドラッグアンドドロップすると、無事、解凍され、中に.exeファイルがあったので、これをめんどくさいのでそのままデスクトップに移動した。

4. 「歌声りっぷ」の使用

4-a. 16bitのwavでなければいけない

GUIめんどいので、MacなりLinux環境で、ffmpegCLIをつかった

# オリジナルトラックとオフボーカルトラック両方用意する
% ffmpeg -i ./original.mp3 -acodec pcm_s16le original.wav
% ffmpeg -i ./offvocal.mp3 -acodec pcm_s16le offvocal.wav

4-b. 実行!

Google Driveかなんかに入れて、Windowsに渡して、歌声りっぷする。した。

結果の比較

Phonic Mind
Ableton Live
歌声りっぷ

結論

  • 今回のケースでは「Phonic Mind」が段違いに性能悪いように聞こえるが、曲によってはバッチリ抜けることもある
  • 「Ableton Live」で自分で頑張る場合には、ここからさらにEffect/Filterなどでならしていく余地があるし、やっぱり楽
  • 何も設定いじらず、「歌声りっぷ」が今回は最も良い結果になった。がんばってWindows環境構築してよかった

謝辞

どうしても歌声りっぷ使ってみたいという今回の検証にあたって、大好きなトラックメーカーであるハナカミリュウさん、DJの先生であるKAZZONE大先生、間接的ではありますがCoNoSyuNya氏、にたいへん助けていただきました。ありがとうございます。

なお、今回がんばってアレしたソレで、はじめてのマッシュアップトラックをつくって、来たる 11月2日(金曜日)の Sound Sandbox vol.3 で流そうと画策しています!どうぞ遊びに来てください!

soundsandbox.tokyo

で、完成したもの

上記のイベントでかけた。マッシュアップたのしい。

soundcloud.com

DRYな備忘録として

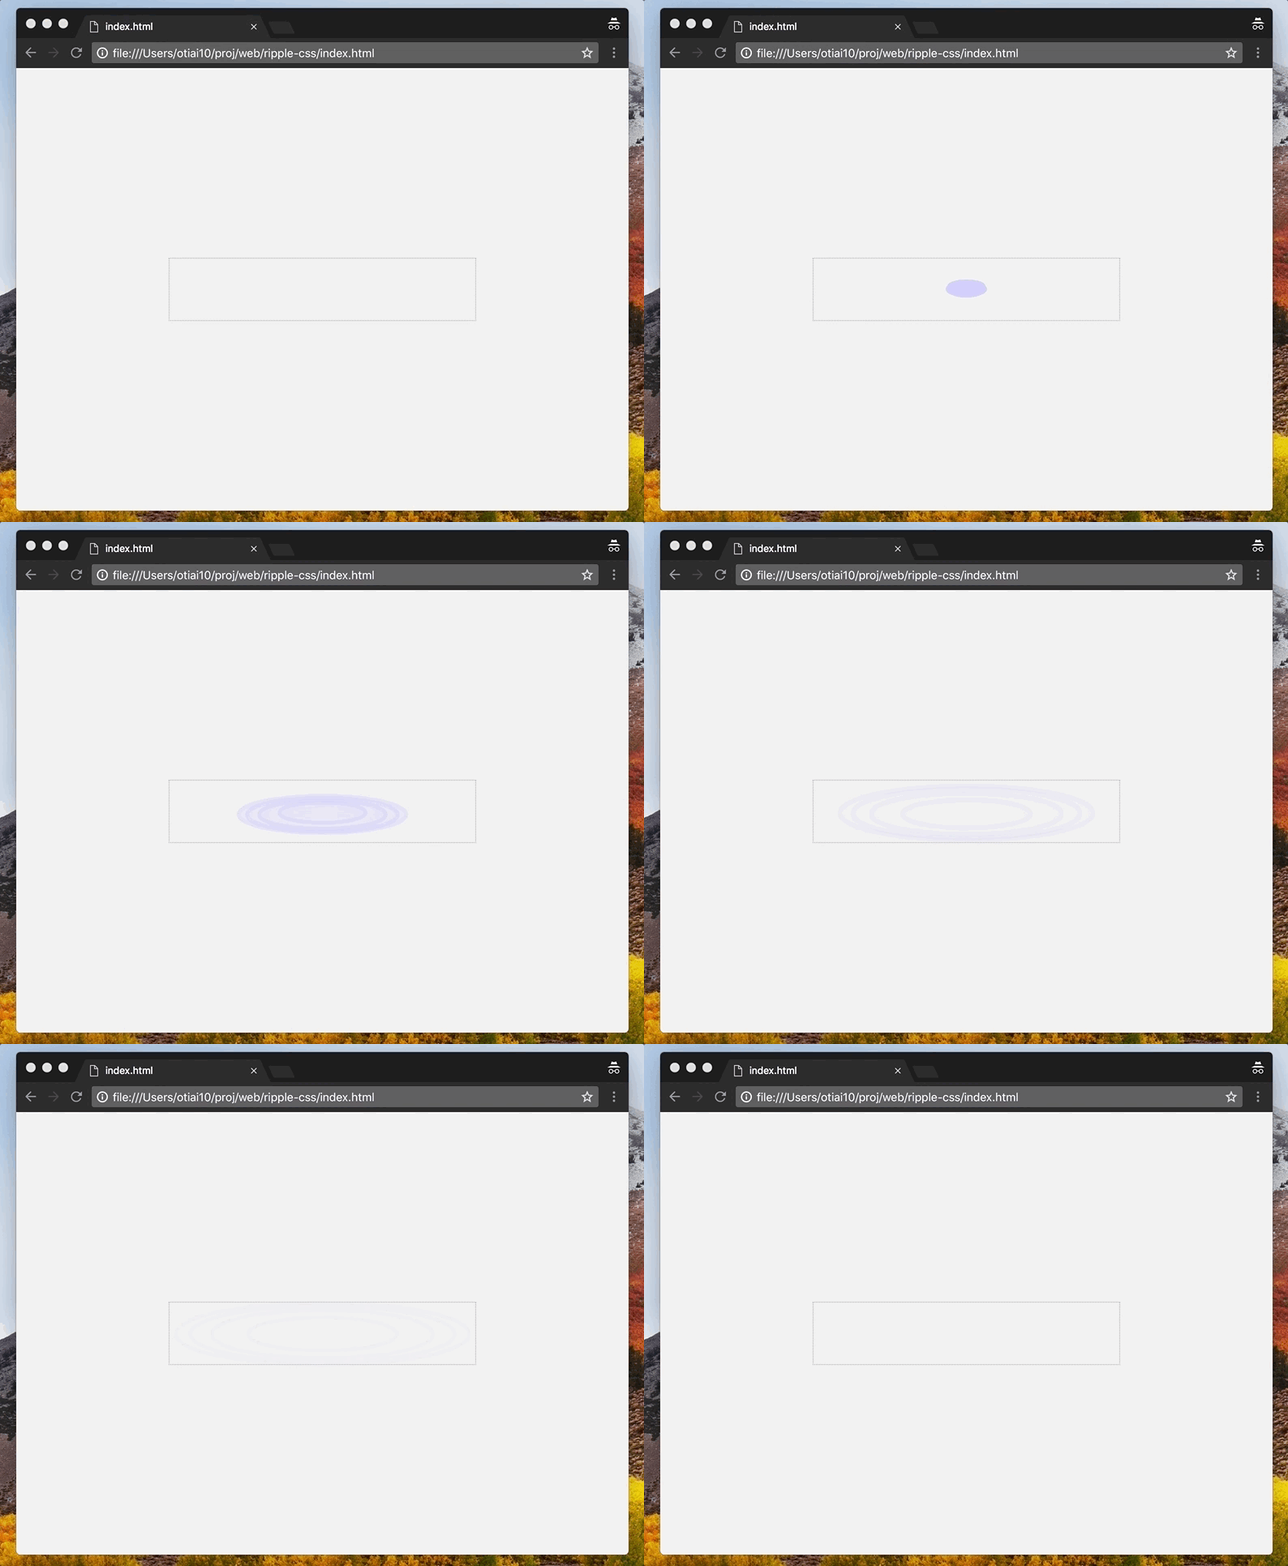
CSSアニメーションで水面の波紋を表現

背景

某これウィジェット*1のローディングインジケータに、水面の波紋のアニメーションGIFを使ってたんですが、アニメーションGIFをインターネッツで漁ったりライセンス確認しなきゃならんうえにカスタマイズできないのがしんどくなったので、CSSで作れないかなと思った次第。

方針

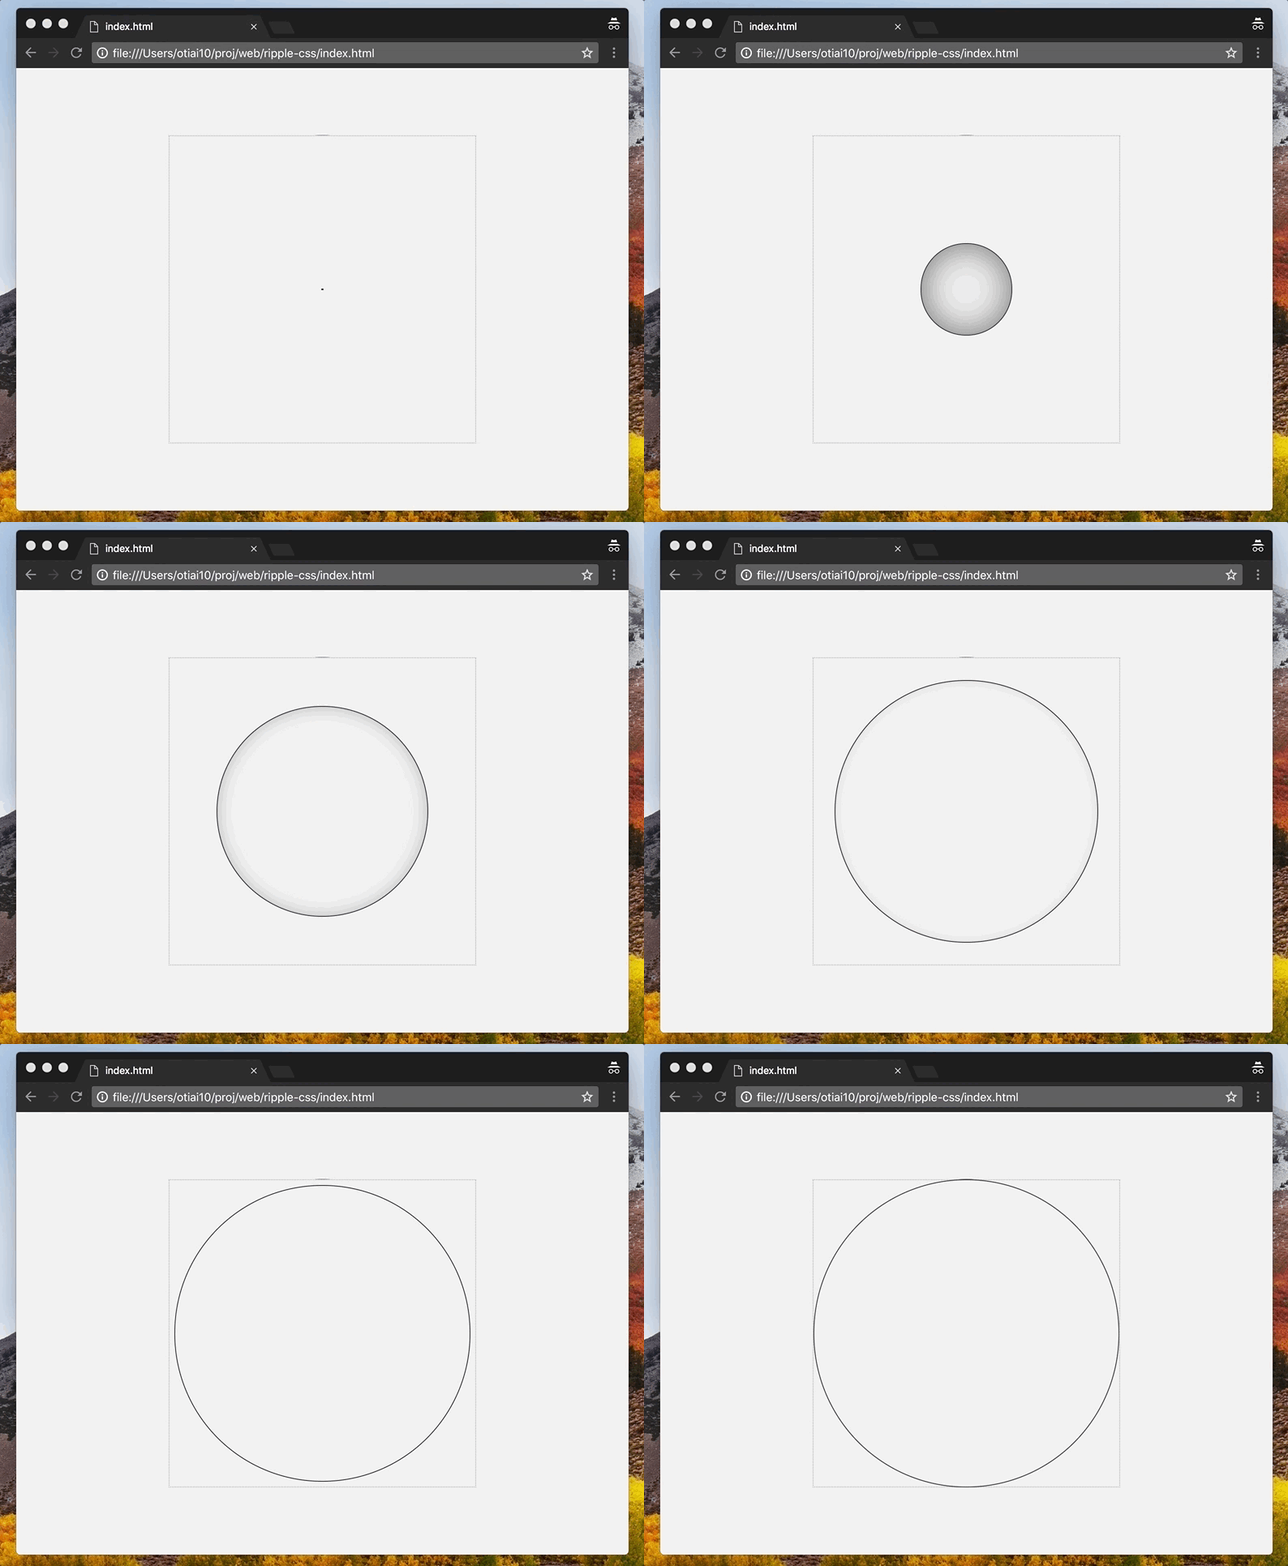
  1. 丸いdivをつくる
  2. 大きさを keyframe animation する
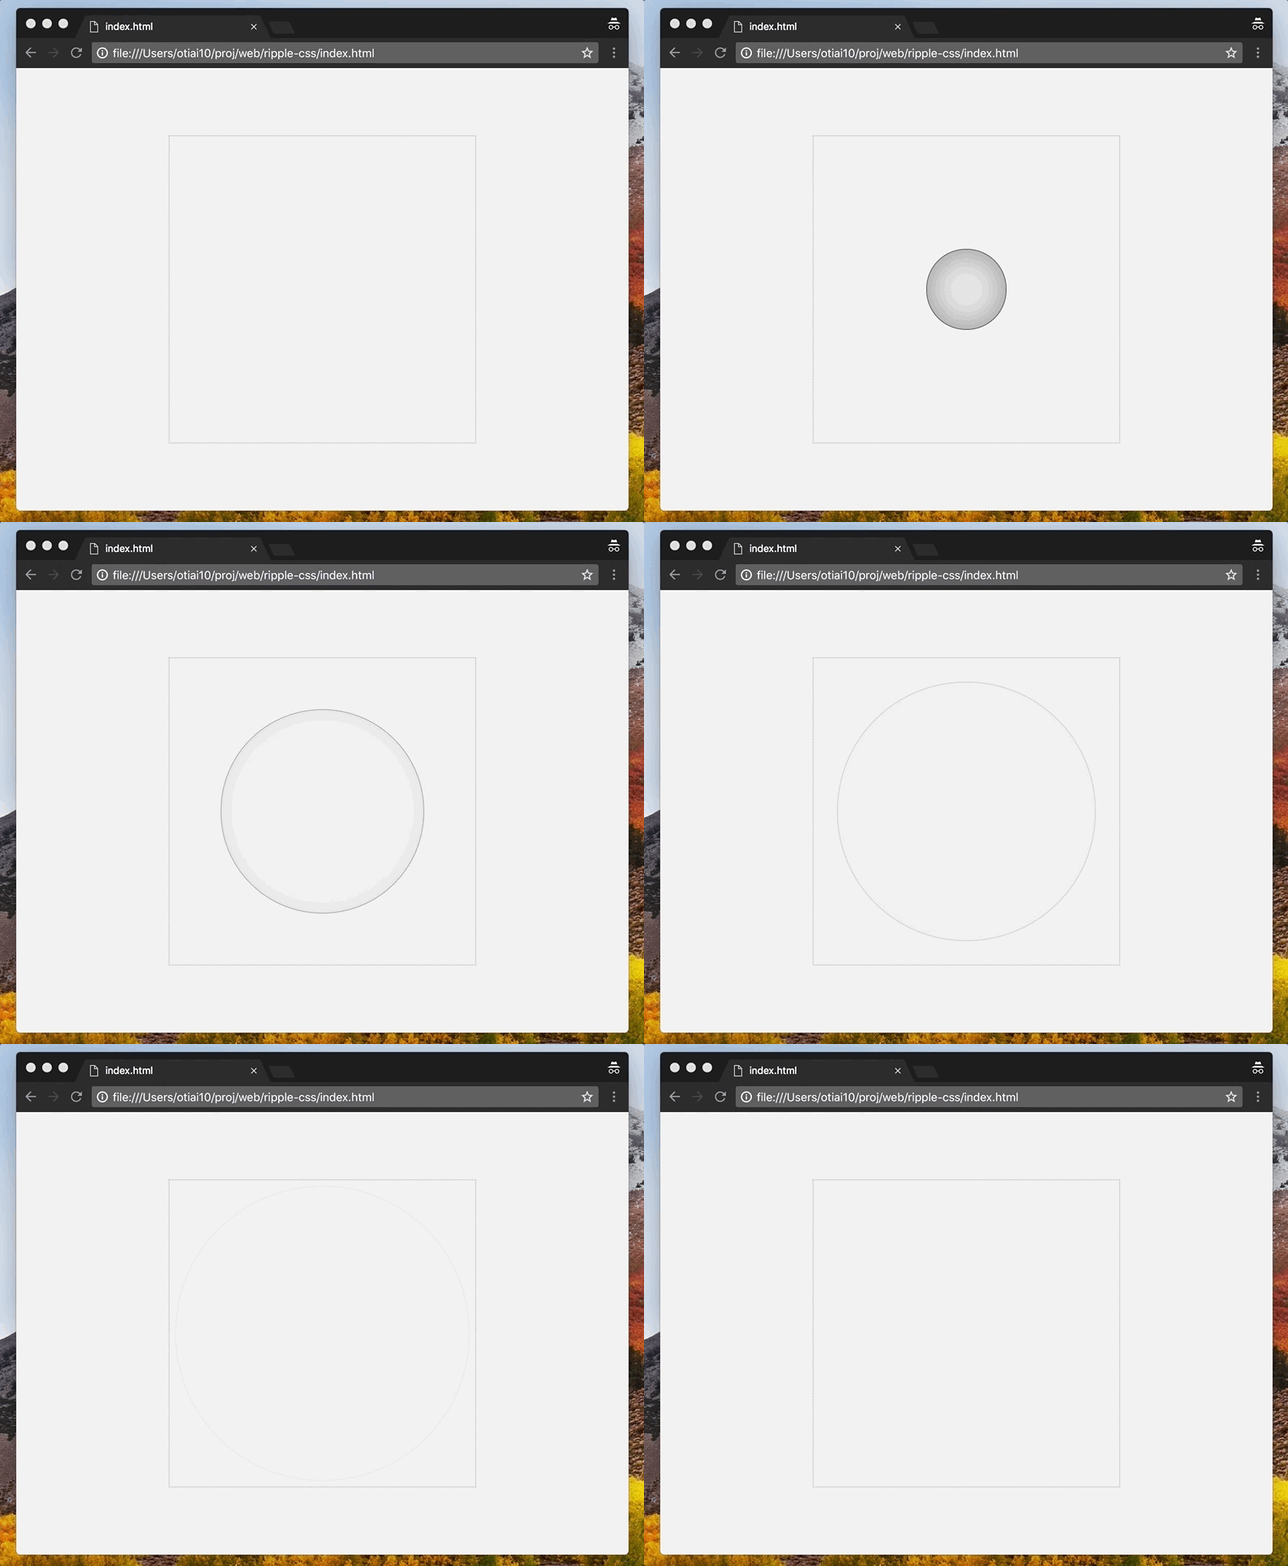
  3. box-shadow inset とかで波っぽくする
  4. 外に行くにつれて薄くすれば消えていく感じになるかな
  5. それらを複数、ずらして重ねればよさそう
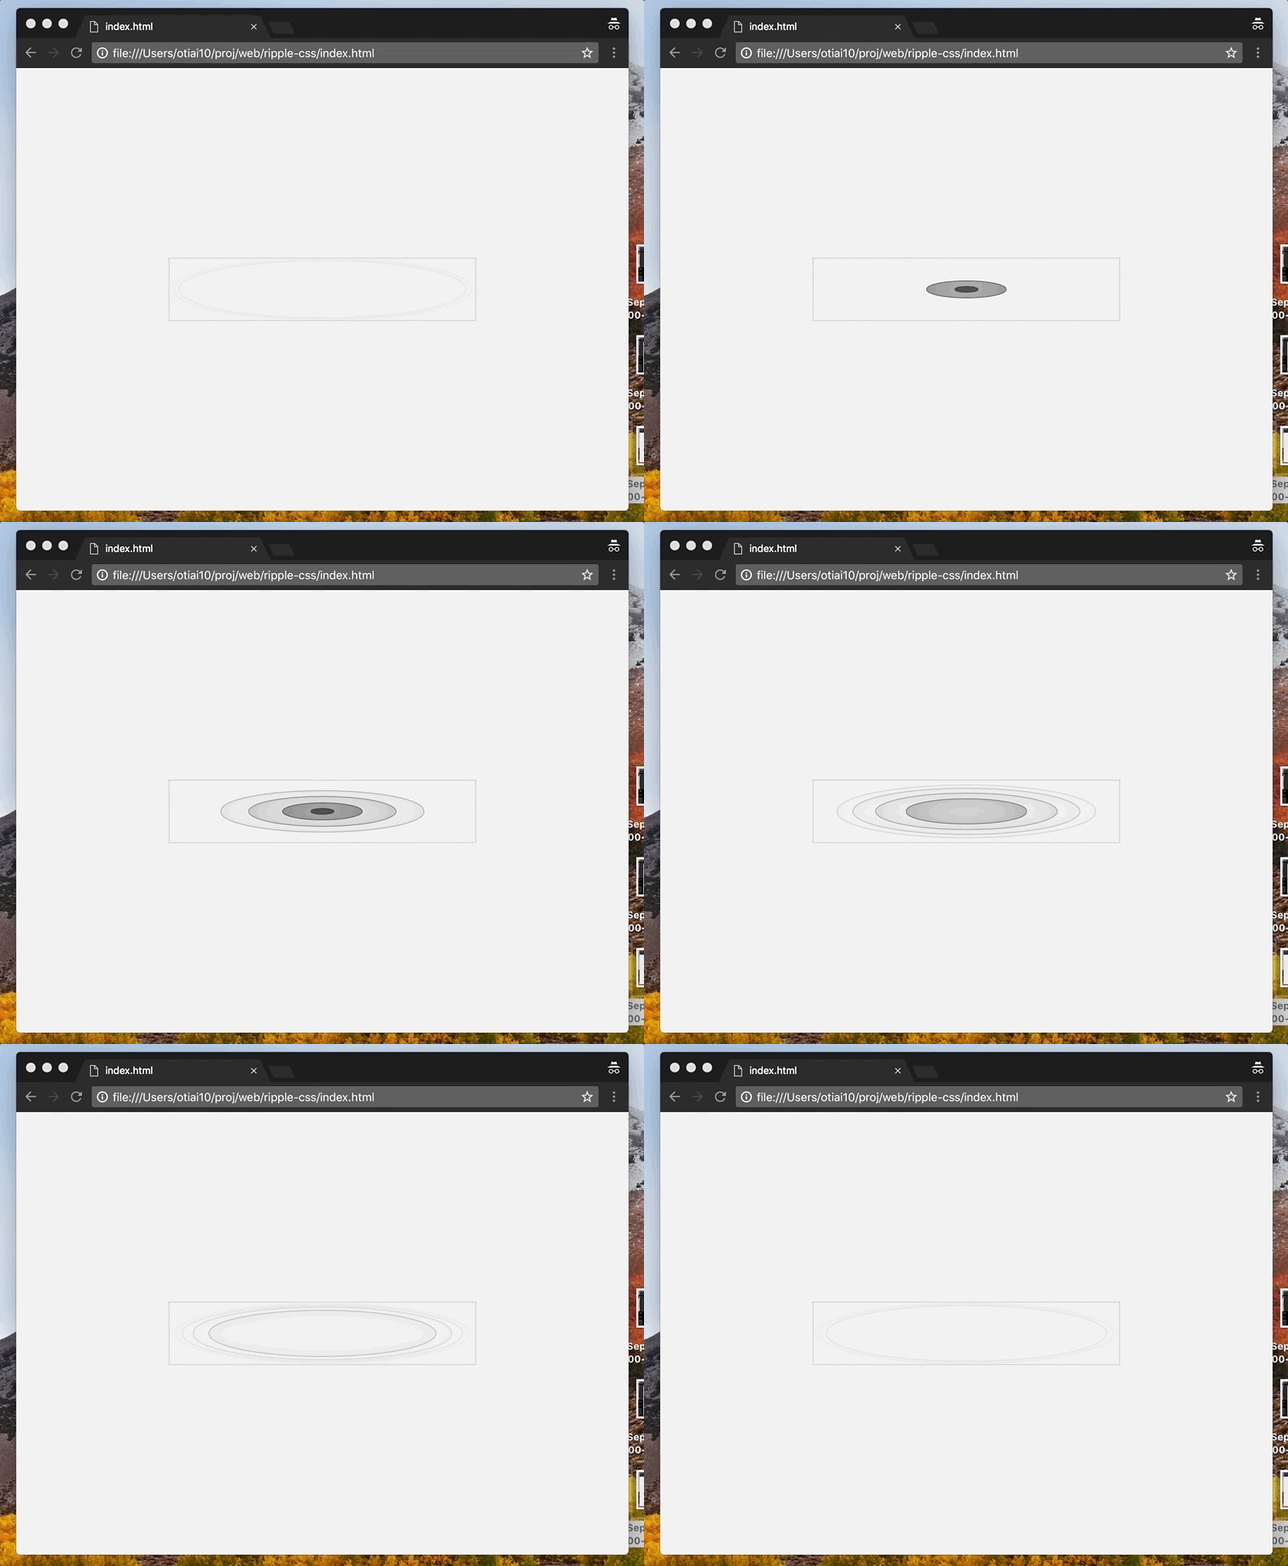
  6. 楕円にして水面表現する
  7. その他のチューニング

うるせえ動くもの見せろ

これです

あと読まなくていいです。

1. 丸いdivをつくる

div.circle {
  width:  80%;
  height: 80%;
  border: solid thin #303030;
  border-radius: 50%;
}

f:id:otiai10:20180902000244p:plain

2. 大きさを keyframe animation する

div.circle {
  /* 略 */
  animation: wave 2s infinite;
}

@keyframes wave {
  from {
    width:  0%;
    height: 0%;
  }
  to {
    width:  100%;
    height: 100%;
  }
}

f:id:otiai10:20180902001043g:plain

Chromeのデフォルトのtiming-functionが都合よくうごいてる。

3. box-shadow inset とかで波っぽくする

@keyframes wave {
  from {
    /* 略 */
    box-shadow: 0 0 100px inset #3f3f3f;
  }
  to {
    /* 略 */
  }
}

f:id:otiai10:20180902001939g:plain

だいぶそれっぽいやんけ。

4. 外に行くにつれて薄くすれば消えていく感じになるかな

@keyframes wave {
  from {
    /* 略 */
  }
  to {
    /* 略 */
    opacity: 0;
  }
}

f:id:otiai10:20180902001758g:plain

かなりそれっぽいやんけ。

5. それらを複数、ずらして重ねればよさそう

      <div class="box">
        <div class="circle layer-0"></div>
        <div class="circle layer-1"></div>
        <div class="circle layer-2"></div>
        <div class="circle layer-3"></div>
      </div>
.box {
    /* 略 */
    position: relative;
}

.circle {
    /* 略 */
    position: absolute;
}

div.circle.layer-0 {
  animation-delay: 0s;
}
div.circle.layer-1 {
  animation-delay: 0.2s;
}
div.circle.layer-2 {
  animation-delay: 0.4s;
}
div.circle.layer-3 {
  animation-delay: 0.6s;
}

f:id:otiai10:20180902002930g:plain

できてるやん。

6. 楕円にして水面表現する

これ、サイズが相対なので、transform使うまでもねえわ。

.box {
    height: 10vw;
    /* 略 */
}

f:id:otiai10:20180902004633g:plain

もうほぼ水面やんけ。

水滴が4つ落ちるのではなく、1滴に対して4種類の波が発生するべき

今、4つの水滴が逐次的に落ちて、それぞれ同じ波が4つ生まれているけど、自然には、1つの水滴が落ちて、複数の種類の波が発生すべきなので、ずらし方を改善する。

f:id:otiai10:20180902004509g:plain

いい感じやんけ。

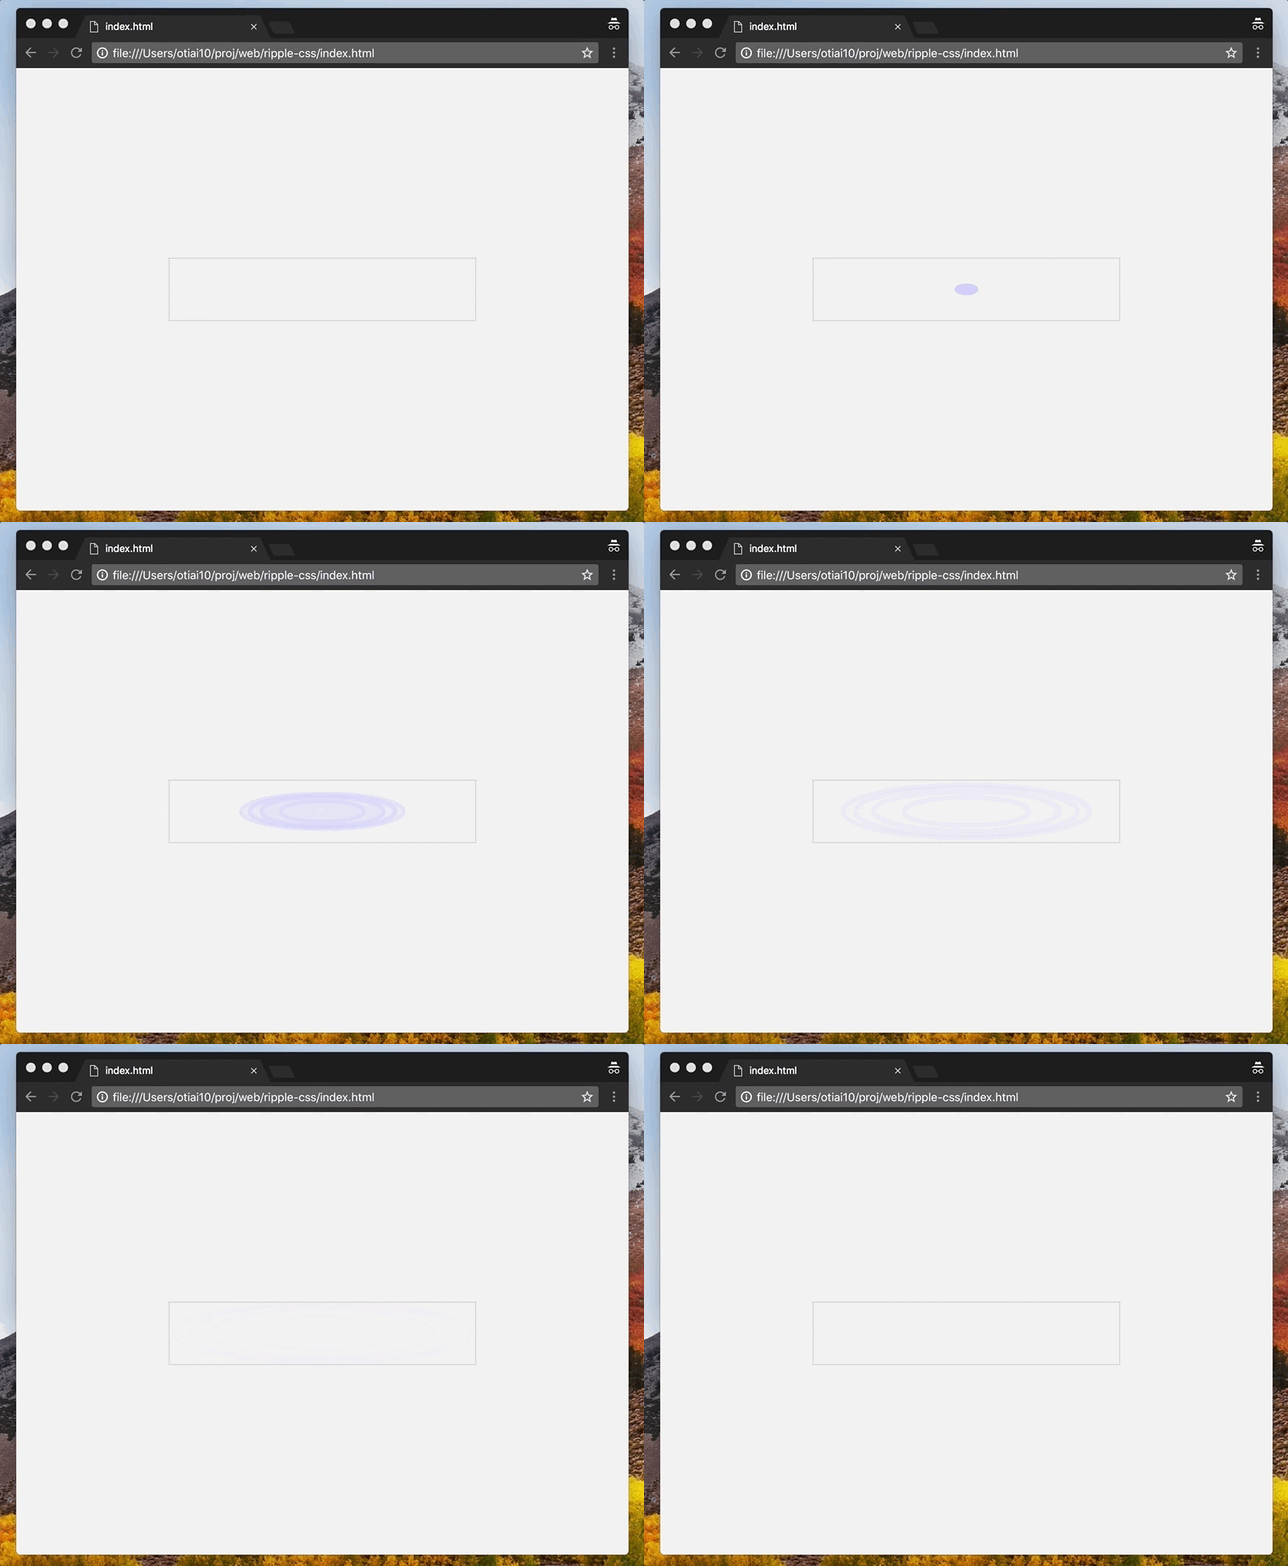
色をちゃんとする

色のセンス無いんだわ〜

f:id:otiai10:20180902005414g:plain

横波をつけてみる

まず沈み込んで、盛り上がって、もっかい沈み込んで、で平常状態に戻る、みたいな感じかな。

f:id:otiai10:20180902010901g:plain

それっぽくなったけど、典型的な「がんばった結果もっさいデザイン」になった気がする。shadowいらないんじゃないかな。

雑感

  • opacityは多く使うのはパフォーマンス的に難あるかもしれない
  • ミニマムな実装としてはこれで満たしてるから、あとはチューニング
  • 他にも方法あったらおしえてください
  • わりとちゃんと働いてがっつり給料もらえる職場があれば紹介してください

DRYな備忘録として

今すぐ使えるCSSレシピブック

今すぐ使えるCSSレシピブック

Go GCP Client で ComputeEngine インスタンスの作成・取得

やりたいことを gcloud SDK で確認

% gcloud compute instances create \
    --project otiai10-sandbox \
    --zone asia-northeast1-a \
    testetst

% gcloud compute instances list \
    --project otiai10-sandbox \
    --filter zone:asia-northeast1-a

Go GCP Client でだいたい同じことやる

これです

github.com

以下全文

package main

import (
    "context"
    "flag"
    "fmt"
    "log"
    "time"

    "google.golang.org/api/googleapi"

    "github.com/otiai10/debug"
    "golang.org/x/oauth2/google"
    compute "google.golang.org/api/compute/v1"
)

var (
    project string
    zone    string
    name    string
)

func init() {
    flag.StringVar(&project, "project", "otiai10-sandbox", "Project name on GCP")
    flag.StringVar(&zone, "zone", "asia-northeast1-a", "Zone of GCP")
    flag.StringVar(&name, "name", "test-instance", "Instance name to create")
    flag.Parse()
}

func main() {

    ctx := context.Background()
    client, err := google.DefaultClient(ctx, compute.ComputeScope)
    if err != nil {
        debug.Fatalln(err)
    }

    service, err := compute.New(client)
    if err != nil {
        debug.Fatalln(err)
    }

    // Read
    instance, err := service.Instances.Get(project, zone, name).Do()

    if err == nil && instance != nil {
        // Delete
        log.Printf("Instance found, trying to delete.")
        _, err := service.Instances.Delete(project, zone, name).Do()
        if err != nil {
            debug.Fatalln(err)
        }
        for count := 0; ; count++ {
            fmt.Print(".")
            _, err := service.Instances.Get(project, zone, name).Do()
            if apierror, ok := err.(*googleapi.Error); ok && apierror.Code == 404 {
                fmt.Print("\n")
                break
            }
            time.Sleep(2 * time.Second)
            if count > 15 {
                debug.Fatalln("Couldn't wait for instance deletion ;(")
            }
        }
        log.Printf("Deleted: %v", name)
    } else if apierror, ok := err.(*googleapi.Error); !ok || apierror.Code != 404 {
        debug.Fatalln(err)
    }

    // Create
    instance = &compute.Instance{
        Description: "This is test",
        Name:        name,
        MachineType: fmt.Sprintf("zones/%s/machineTypes/n1-standard-1", zone),
        NetworkInterfaces: []*compute.NetworkInterface{
            &compute.NetworkInterface{
                Network: fmt.Sprintf("https://www.googleapis.com/compute/v1/projects/%s/global/networks/default", project),
            },
        },
        Disks: []*compute.AttachedDisk{
            &compute.AttachedDisk{
                AutoDelete: true,
                Boot:       true,
                Type:       "PERSISTENT",
                InitializeParams: &compute.AttachedDiskInitializeParams{
                    SourceImage: "projects/debian-cloud/global/images/debian-9-stretch-v20180806",
                    DiskSizeGb:  10,
                },
            },
        },
    }
    _, err = service.Instances.Insert(project, zone, instance).Do()
    if err != nil {
        debug.Fatalln(err)
    }

    log.Println("Created:", instance.Name)
}

雑感

  • AWSより概念が細分化されており、SDKとしての Hello World まで行くのはわりと大変だったけど、一度動いてしまったら、概念が明確で、とても使いやすい印象

DRYな備忘録として

クラウドエンジニア養成読本[クラウドを武器にするための知識&実例満載! ] (Software Design plusシリーズ)

クラウドエンジニア養成読本[クラウドを武器にするための知識&実例満載! ] (Software Design plusシリーズ)

【メモ】Slackチャンネルへの画像の投稿

参考

curl

% curl -XPOST "https://slack.com/api/files.upload" \
    -H "Content-Type: multipart/form-data" \
    -F file=@/Users/otiai10/Desktop/ritsu.jpeg \
    -F token=xoxb-123-456-xxxxxxxxx \
    -F channels=bot-dev \
    | jq
{
  "ok": true,
  "file": {
    "url_private": "https://files.slack.com/files-pri/ABCDEFGHIJKLMNOPQRSTUVWXYZ/ritsu.jpeg",
    "url_private_download": "https://files.slack.com/files-pri/ABCDEFGHIJKLMNOPQRSTUVWXYZ/download/ritsu.jpeg",
    // いろいろ省略
}

DRY

【メモ】VPCエンドポイントについて

背景

  • EC2とS3が密に関係するソフトウェアを書いてるんですが、VPCエンドポイントの概念を知らなかったので、非常に悔やまれます。

資料

VPCエンドポイントが解決する問題

  • EC2インスタンスなどVPC内のサービスから、S3を参照するさい、InternetGatewayやNATを通って一度インターネットに出る必要がある
  • これを、VPCエンドポイントという概念を使って、インターネットに出ずに、AWSのネットワーク内でS3まで到達できるようになった
    • 具体的には、 S3のエンドポイントをDestinationとし、VPCエンドポイント(vpce-から始まるリソース)をTargetとするRouteをRouteTablesに追加することによって実現する
    • リージョンはまたげない
  • NATの負荷軽減、セキュリティの強化が期待できる

使い方の概要

概念的なところ。

  1. 確認用に、インターネットに出ていけないSubnetをつくる
    • のちにこれにsshして動作確認するので、必要なら、自宅なりオフィスのIPアドレスDestinationとしInternetGatewayをTargetに持つRouteだけは、追加しておく
  2. このSubnetの配下にEC2インスタンスを作成する
    • SecurityGroupはiptablesみたいなもので今回の検証とはレイヤーが違うので、検証環境からsshできるIn/Outを設定すればよい
  3. このEC2インスタンスsshする
    • あとで使うので、必要なら sudo yum install -y python-pip && pip install awscli とかしとく
  4. ping google.comとかやって、インターネットに出ていけないことを確認する
  5. aws s3 ls your-bucket などして無反応なことを確認する
    • なぜなら、EC2からS3は、デフォルトではインターネット経由だから
  6. VPCエンドポイントを作成し、このSubnetと紐付ける( ≒ RouteをRouteTablesに追加する)
  7. やはり、ping google.com は通らない
  8. しかし、aws s3 ls your-bucket は通る
    • なぜなら、EC2からS3への疎通はVPCエンドポイントが使われるようになったから

※ リージョン跨げないので、your-bucketはEC2と同リージョンである必要がある

DRYな備忘録として

Amazon Web Services 基礎からのネットワーク&サーバー構築 改訂版

Amazon Web Services 基礎からのネットワーク&サーバー構築 改訂版

【Go言語】aws-sdk-goを使ったVPC新規作成からEC2のsshまで

前回これをやったので、

otiai10.hatenablog.com

今回は、これをGoのSDKからやる。

結果だけくれ

はい

github.com

以下ペライチ全文

package main

import (
    "flag"
    "fmt"
    "log"

    "github.com/aws/aws-sdk-go/aws"
    "github.com/aws/aws-sdk-go/aws/session"
    "github.com/aws/aws-sdk-go/service/ec2"
)

var (
    region string
    name   string
    clean  bool
)

func init() {
    flag.StringVar(&region, "region", "ap-northeast-1", "Region")
    flag.StringVar(&name, "name", "otiai10-sdk-test", "Name of VPC")
    flag.BoolVar(&clean, "clean", false, "Clean up created VPC")
    flag.Parse()
}

func main() {
    sess := session.New(&aws.Config{
        Region: aws.String(region),
    })
    client := ec2.New(sess)

    // Get VPC if exists
    vpcsout, err := client.DescribeVpcs(&ec2.DescribeVpcsInput{
        Filters: []*ec2.Filter{
            &ec2.Filter{Name: aws.String("tag:Name"), Values: aws.StringSlice([]string{name})},
        },
    })
    if err != nil {
        log.Fatalln("01", err)
    }

    if vpcs := vpcsout.Vpcs; len(vpcs) != 0 {
        fmt.Printf("%+v\n", vpcs[0])
        fmt.Printf("Total %d VPCs.\n", len(vpcs))
        if !clean {
            return // If exists, do nothing
        }
        // Clean up if "clean" flag is specified.
        if err := cleanupVpcs(client, vpcs); err != nil {
            log.Fatalln("01-clean", err)
        }
    }

    // Create because it doesn't exist
    createout, err := client.CreateVpc(&ec2.CreateVpcInput{
        CidrBlock: aws.String("10.0.0.0/24"),
    })
    if err != nil {
        log.Fatalln("02", err)
    }
    vpc := createout.Vpc
    fmt.Println("VPC created:", *vpc.VpcId)
    // Name this VPC
    _, err = client.CreateTags(&ec2.CreateTagsInput{
        Tags: []*ec2.Tag{
            {Key: aws.String("Name"), Value: aws.String(name)},
        },
        Resources: []*string{vpc.VpcId},
    })
    if err != nil {
        log.Fatalln("03", err)
    }

    // Create subnet
    subnetout, err := client.CreateSubnet(&ec2.CreateSubnetInput{
        AvailabilityZone: aws.String(region + "a"), // FIXME: hard coded
        CidrBlock:        aws.String("10.0.0.0/28"),
        VpcId:            vpc.VpcId,
    })
    if err != nil {
        log.Fatalln("04", err)
    }
    subnet := subnetout.Subnet
    fmt.Println("Subnet created:", *subnet.SubnetId)
    _, err = client.CreateTags(&ec2.CreateTagsInput{
        Tags: []*ec2.Tag{
            {Key: aws.String("Name"), Value: aws.String(name + "-sn")},
        },
        Resources: []*string{subnet.SubnetId},
    })
    if err != nil {
        log.Fatalln("05", err)
    }

    // Create InternetGateway
    gatewayout, err := client.CreateInternetGateway(&ec2.CreateInternetGatewayInput{})
    if err != nil {
        log.Fatalln("06", err)
    }
    gateway := gatewayout.InternetGateway
    fmt.Println("InternetGateway created:", *gateway.InternetGatewayId)
    _, err = client.CreateTags(&ec2.CreateTagsInput{
        Tags: []*ec2.Tag{
            {Key: aws.String("Name"), Value: aws.String(name + "-ig")},
        },
        Resources: []*string{gateway.InternetGatewayId},
    })
    if err != nil {
        log.Fatalln("07", err)
    }

    // Attach this InternetGateway to VPC
    _, err = client.AttachInternetGateway(&ec2.AttachInternetGatewayInput{
        InternetGatewayId: gateway.InternetGatewayId,
        VpcId:             vpc.VpcId,
    })
    if err != nil {
        log.Fatalln("08", err)
    }

    // Create RouteTables
    routetablesout, err := client.DescribeRouteTables(&ec2.DescribeRouteTablesInput{
        Filters: []*ec2.Filter{
            {Name: aws.String("vpc-id"), Values: []*string{vpc.VpcId}},
        },
    })
    if err != nil {
        log.Fatalln("09", err)
    }
    if len(routetablesout.RouteTables) == 0 {
        log.Fatalln("10", "No route table found on this VPC")
    }
    routetable := routetablesout.RouteTables[0]
    fmt.Println("RouteTable created:", *routetable.RouteTableId)
    _, err = client.CreateTags(&ec2.CreateTagsInput{
        Tags: []*ec2.Tag{
            {Key: aws.String("Name"), Value: aws.String(name + "-rt")},
        },
        Resources: []*string{routetable.RouteTableId},
    })
    if err != nil {
        log.Fatalln("11", err)
    }

    // Create Routing Rule on this RouteTables
    _, err = client.CreateRoute(&ec2.CreateRouteInput{
        DestinationCidrBlock: aws.String("0.0.0.0/0"),
        RouteTableId:         routetable.RouteTableId,
        GatewayId:            gateway.InternetGatewayId,
    })
    if err != nil {
        log.Fatalln("12", err)
    }
    fmt.Println("Route created")

    fmt.Println("Congrats! Everything is up!!")
}

func cleanupVpcs(client *ec2.EC2, vpcs []*ec2.Vpc) error {
    for _, vpc := range vpcs {
        if err := cleanupVpc(client, vpc); err != nil {
            return err
        }
    }
    return nil
}
func cleanupVpc(client *ec2.EC2, vpc *ec2.Vpc) error {

    // Delete InternetGateway
    igws, err := client.DescribeInternetGateways(&ec2.DescribeInternetGatewaysInput{
        Filters: []*ec2.Filter{
            {Name: aws.String("tag:Name"), Values: aws.StringSlice([]string{name + "-ig"})},
        },
    })
    if err != nil {
        return err
    }
    fmt.Printf("%d InternetGateways found,\n", len(igws.InternetGateways))
    for _, ig := range igws.InternetGateways {
        if _, err := client.DetachInternetGateway(&ec2.DetachInternetGatewayInput{
            InternetGatewayId: ig.InternetGatewayId,
            VpcId:             vpc.VpcId,
        }); err != nil {
            return err
        }
        if _, err := client.DeleteInternetGateway(&ec2.DeleteInternetGatewayInput{
            InternetGatewayId: ig.InternetGatewayId,
        }); err != nil {
            return err
        }
    }
    fmt.Println("and deleted.")

    // Delete Subnets
    snts, err := client.DescribeSubnets(&ec2.DescribeSubnetsInput{
        Filters: []*ec2.Filter{
            {Name: aws.String("tag:Name"), Values: aws.StringSlice([]string{name + "-sn"})},
        },
    })
    if err != nil {
        return err
    }
    fmt.Printf("%d Subnets found,\n", len(snts.Subnets))
    for _, sn := range snts.Subnets {
        if _, err := client.DeleteSubnet(&ec2.DeleteSubnetInput{
            SubnetId: sn.SubnetId,
        }); err != nil {
            return err
        }
    }
    fmt.Println("and deleted.")

    // Delete VPC
    if _, err := client.DeleteVpc(&ec2.DeleteVpcInput{
        VpcId: vpc.VpcId,
    }); err != nil {
        return err
    }
    fmt.Printf("VPC %s deleted.", *vpc.VpcId)

    return err
}

雑感

DRYな備忘録として

Amazon Web Services実践入門 (WEB+DB PRESS plus)

Amazon Web Services実践入門 (WEB+DB PRESS plus)

Goならわかるシステムプログラミング

Goならわかるシステムプログラミング

aws cli を使ったVPCの新規作成からEC2へのsshまで

まずWebコンソールでゴールの確認

  1. VPCの作成
  2. Subnetの作成
  3. InternetGatewayの作成
  4. VPCに上記3のInternetGatewayをアタッチ
  5. SubnetのRouteTableに上記3のInternetGatewayに紐付いたルールを追加
  6. 上記1のVPC内で、上記2のSubnet配下に、EC2インスタンスをつくる
  7. (適宜、必要があればSecurityGroupのInboundをいじったりする)
  8. sshできる。

ここまでやった。できた。

% ssh -i ~/Desktop/otiai10.tokyo.pem ec2-user@54.249.68.183

       __|  __|_  )
       _|  (     /   Amazon Linux 2 AMI
      ___|\___|___|

https://aws.amazon.com/amazon-linux-2/
[ec2-user@ip-10-0-0-11 ~]$ exit
logout
Connection to 54.249.68.182 closed.

これをゴールとして、以下、これをaws cliだけでやっていく。

まずはお掃除する。

% aws ec2 describe-vpcs \
  --filters Name=tag:Name,Values=otiai10-test-web \
  | jq .Vpcs[].VpcId

% aws ec2 delete-vpc --vpc-id vpc-374f0d50

An error occurred (DependencyViolation) when calling the DeleteVpc operation: The vpc 'vpc-374f0d50' has dependencies and cannot be deleted.

% aws ec2 delete-vpc help

NAME
       delete-vpc -

DESCRIPTION
       Deletes  the  specified VPC. You must detach or delete all gateways and
       resources that are associated with the VPC before you  can  delete  it.
       For  example,  you  must  terminate  all  instances running in the VPC,
       delete all security groups associated with the VPC (except the  default
       one),  delete  all  route  tables  associated  with the VPC (except the
       default one), and so on.

まあそうですよね。消すべき要素としては、

  1. EC2インスタンス
  2. Subnet
  3. InternetGateway
  4. 最後に、VPC

という感じだろうか。

# EC2インスタンスIDの取得
% aws ec2 describe-instances \
  --filters Name=tag:Name,Values='otiai10 Test' \
  | jq .Reservations[].Instances[].InstanceId

# セキュリティグループの取得
% aws ec2 describe-instances \
  --filters Name=tag:Name,Values='otiai10 Test' \
  | jq .Reservations[].Instances[].SecurityGroups

# EC2インスタンスの削除
% aws ec2 terminate-instances \
  --instance-ids i-0acd5d33bb4196314

# セキュリティグループの削除
% aws ec2 delete-security-group \
  --group-id sg-7fb2ec07
# Subnet IDの取得
% aws ec2 describe-subnets \
  --filters Name=tag:Name,Values=otiai10-test-web-example \
  | jq .Subnets[].SubnetId

# Subnetの削除
% aws ec2 delete-subnet \
  --subnet-id subnet-39020970
# InternetGatewayのIDの取得
% aws ec2 describe-internet-gateways \
  --filters Name=tag:Name,Values=otiai10-test-web-ig \
  | jq .InternetGateways[].InternetGatewayId

# InternetGatewayの削除
% aws ec2 delete-internet-gateway \
  --internet-gateway-id igw-6de6b009

An error occurred (DependencyViolation) when calling the DeleteInternetGateway operation:
The internetGateway 'igw-6de6b009' has dependencies and cannot be deleted.

おっと。なんだ。detachか?

# VPC IDの取得
% aws ec2 describe-vpcs \
  --filters Name=tag:Name,Values=otiai10-test-web \
  | jq .Vpcs[].VpcId

# InternetGatewayをVPCからdetach
% aws ec2 detach-internet-gateway \
  --internet-gateway-id igw-6de6b009 \
  --vpc-id vpc-374f0d50

# VPCの削除
% aws ec2 delete-vpc --vpc-id vpc-374f0d50

# InternetGatewayの削除
% aws ec2 delete-internet-gateway \
  --internet-gateway-id igw-6de6b009

awscliを使ったVPCの新規作成からEC2へのssh可能状態まで

VPCを作成。

% aws ec2 create-vpc --cidr-block 10.0.0.0/16 | jq .Vpc.VpcId
"vpc-b7e4acd0"
% aws ec2 create-tags \
   --resources vpc-b7e4acd0 \
   --tags Key=Name,Value=otiai10-test

% aws ec2 describe-vpcs \
  --filter Name=tag:Name,Values=otiai10-test 

# 取れてることを確認

Subnetの作成。

% aws ec2 create-subnet \
  --availability-zone ap-northeast-1a \
  --cidr-block 10.0.0.0/18 \
  --vpc-id vpc-b7e4acd0

# 一応名前つけとく
% aws ec2 create-tags \
  --resources subnet-eb6076a2 \
  --tags Key=Name,Value=otiai10-sn

InternetGatewayの作成。

% aws ec2 create-internet-gateway

# 一応名前つけとく
% aws ec2 create-tags \
  --resources igw-a9beedcd \
  --tags Key=Name,Value=otiai10-ig

InternetGatewayをVPCにアタッチ。

% aws ec2 attach-internet-gateway \
  --vpc-id vpc-b7e4acd0 \
  --internet-gateway-id igw-a9beedcd

MainのRouteTableの確認。

% aws ec2 describe-route-tables \
  | jq '.RouteTables[] | select(.VpcId =="vpc-b7e4acd0")'

ここにRouteの追加。

% aws ec2 create-route \
  --destination-cidr-block 0.0.0.0/0 \
  --route-table-id rtb-57a20331 \
  --gateway-id igw-a9beedcd

これで一応要件を満たしたVPCvpc-b7e4acd0 )ができたと思う。

動作確認

SecurityGroupの作成。

% aws ec2 create-security-group \
  --group-name otiai10-ssh \
  --description ssh-from-office \
  --vpc-id vpc-b7e4acd0

# オフィスからのSSHを開ける
% aws ec2 authorize-security-group-ingress \
  --group-id sg-ab5550d3 \
  --protocol tcp \
  --port 22 \
  --cidr 106.180.6.34/32

EC2インスタンスの作成

% aws ec2 run-instances \
  --instance-type t2.nano \
  --image-id ami-e99f4896 \
  --key-name otiai10.tokyo \
  --security-group-ids sg-ab5550d3 \
  --subnet-id subnet-eb6076a2 \
  --associate-public-ip-address

EC2インスタンスへのSSH

% ssh \
  -i ~/.ssh/aws/otiai10.tokyo.pem \
  ec2-user@52.197.24.227


       __|  __|_  )
       _|  (     /   Amazon Linux 2 AMI
      ___|\___|___|

https://aws.amazon.com/amazon-linux-2/
[ec2-user@ip-10-0-8-208 ~]$
[ec2-user@ip-10-0-8-208 ~]$ uname -a
Linux ip-10-0-8-208.ap-northeast-1.compute.internal 4.14.47-64.38.amzn2.x86_64 #1 SMP Mon Jun 18 22:33:07 UTC 2018 x86_64 x86_64 x86_64 GNU/Linux
[ec2-user@ip-10-0-8-208 ~]$ exit
logout
Connection to 52.197.24.227 closed.
%
%

できた。帰りはしんどいのでWebコンソールでお掃除した。

DRYな備忘録として

Amazon Web Services 基礎からのネットワーク&サーバー構築 改訂版

Amazon Web Services 基礎からのネットワーク&サーバー構築 改訂版

Amazon Web Servicesではじめる新米プログラマのためのクラウド超入門 (CodeZine BOOKS)

Amazon Web Servicesではじめる新米プログラマのためのクラウド超入門 (CodeZine BOOKS)