DRYな備忘録

Don't Repeat Yourself.

ブラウザでMediaStreamを動画に固めて保存したい

ゴール

ブラウザのJavaScriptで、MediaStreamを動画ファイルにしてローカルに保存できるようにしたい。

参考

tl;dr

  1. 好きな方法でMediaStreamを取得する
  2. 取得したstreamを使ったMediaRecorderを作成する
  3. MediaRecorderのondataavailableで取得したdataを貯めていく
  4. 任意のタイミングで、溜まったdataをBlobにする
  5. BlobからURL.createObjectURLで特定のURLを得る
  6. あとはこれをa.hrefに突っ込んでa.downloadに突っ込んでとかすればよい

サンプル

このへんです。(雑)

github.com

TravisCI using fastlane failed with message "Your bundle is locked to credentials_manager (0.16.2)"

Problem

$ bundle install --jobs=3 --retry=3 --deployment
Fetching gem metadata from https://rubygems.org/........
Fetching version metadata from https://rubygems.org/..
Fetching dependency metadata from https://rubygems.org/.

Your bundle is locked to credentials_manager (0.16.2), but that version could
not be found in any of the sources listed in your Gemfile. If you haven't
changed sources, that means the author of credentials_manager (0.16.2) has
removed it. You'll need to update your bundle to a different version of
credentials_manager (0.16.2) that hasn't been removed in order to install.

Research

github.com

My legacy environments were fixed old fastlane version (1.103.0) and builds started breaking because credentials_manager version 0.16.2 has been removed from rubygems.

Solution

# frozen_string_literal: true
source "https://rubygems.org"

-gem "fastlane", "1.109.0"
+gem "fastlane", "2.5.0"

DRY

Swift実践入門 ── 直感的な文法と安全性を兼ね備えた言語 (WEB+DB PRESS plus)

Swift実践入門 ── 直感的な文法と安全性を兼ね備えた言語 (WEB+DB PRESS plus)

iOSプロジェクトをTravisCIでCIしたい

Travis CIでCIしたい」なのか「TravisでCIしたい」なのか悩みました。

参考

tl;dr

  1. gem install fastlane
  2. 必要があれば sudo xcodebuild -license accept しておく
  3. fastlane init
  4. fastlane test してみる
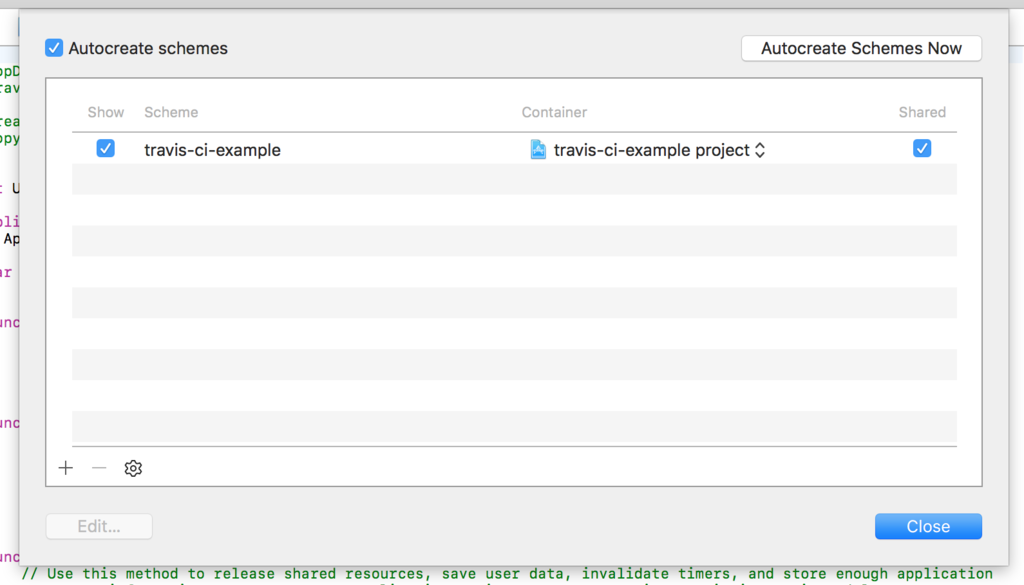
  5. CIサーバのためにschemeをsharedにする
  6. Travis CI用の設定ファイルを設置
  7. Travis CIのコンソールでこのレポジトリのCIを有効にする

github.com

ログ

fastlaneをインストール

% gem install fastlane
# ... 中略 ...
63 gems installed
% which fastlane
/Users/otiai10/.rbenv/shims/fastlane
% fastlane --help
  fastlane

  CLI for 'fastlane' - The easiest way to automate beta deployments and releases for your iOS and Android apps

        Run using `fastlane [platform] [lane_name]`
        To pass values to the lanes use `fastlane [platform] [lane_name] key:value key2:value2`

  Commands:
        # いろいろ

fastlane init

% fastlane init
# 1. Apple IDを聞かれるので答える
# 2. そのApple IDのpasswordを聞かれるので答える
# 3. Developerポータルで複数チームが紐付いているのでチームを選べと言われるので答える
#        - 個人のorgを選択
# 4. iTunesConnectで複数のチームが紐付いているのでチームを選べと言われるので答える
#        - 個人のorgを選択
# 5. DeveloperポータルとiTunesConnectにこのapp identifierが無いから作るか?と聞かれる
#        - この備忘録用なので要らない n
# 6. なぜかもう一回同じことを聞かれる
#        - この備忘録用なので要らない n
# ls fastlane
Appfile     Fastfile

fastlane/Appfilefastlane/Fastfile がつくられる

fastlane test してみる

% fastlane test
[13:22:24]: -------------------------------------------------
[13:22:24]: --- Step: Verifying required fastlane version ---
[13:22:24]: -------------------------------------------------
[13:22:24]: Your fastlane version 1.111.0 matches the minimum requirement of 1.111.0  ✅
[13:22:24]: ------------------------------
[13:22:24]: --- Step: default_platform ---
[13:22:24]: ------------------------------
[13:22:24]: Driving the lane 'ios test' 🚀
[13:22:24]: ------------------
[13:22:24]: --- Step: scan ---
[13:22:24]: ------------------
[13:22:24]: $ xcodebuild -list -project ./travis-ci-example.xcodeproj
xcode-select: error: tool 'xcodebuild' requires Xcode, but active developer directory '/Library/Developer/CommandLineTools' is a command line tools instance
[13:22:24]: Variable Dump:
[13:22:24]: {:DEFAULT_PLATFORM=>:ios, :PLATFORM_NAME=>:ios, :LANE_NAME=>"ios test"}
[13:22:24]: Error parsing xcode file using `xcodebuild -list -project ./travis-ci-example.xcodeproj`

+------+-------------------------------------+-------------+
|                     fastlane summary                     |
+------+-------------------------------------+-------------+
| Step | Action                              | Time (in s) |
+------+-------------------------------------+-------------+
| 1    | Verifying required fastlane version | 0           |
| 2    | default_platform                    | 0           |
| 💥    | scan                                | 0           |
+------+-------------------------------------+-------------+

[13:22:24]: fastlane finished with errors

[!] Error parsing xcode file using `xcodebuild -list -project ./travis-ci-example.xcodeproj`

しっぱいする

Error parsing xcode file using xcodebuild -list -project ./travis-ci-example.xcodeproj

xcodebuildコマンドが失敗しているというエラーなので、おそらく

ここで言及されているxcode-selectxcodebuildあたりの操作をすっ飛ばしたことに起因すると思われる。

% sudo xcodebuild -license accept
xcode-select: error: tool 'xcodebuild' requires Xcode, but active developer directory '/Library/Developer/CommandLineTools' is a command line tools instance

error: tool ‘xcodebuild’ requires Xcode, but active developer directory is a command line tools instance

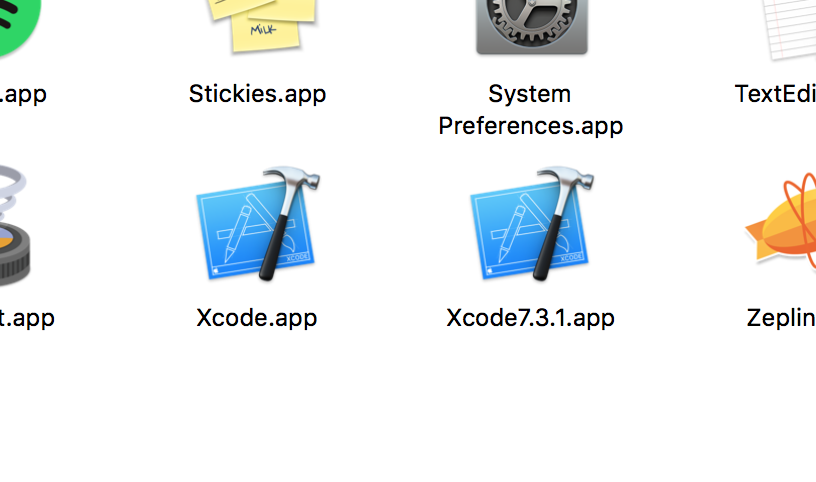
Xcodeをソースで落としてきてビルドしたことに起因する。Xcode.appをちゃんとApplicationsに配置した。

参考: osx - xcode-select active developer directory error - Stack Overflow

f:id:otiai10:20161206214640p:plain

で、あらためて

% sudo xcodebuild -license accept

xcodebuild: error: Scheme travis-ci-example is not currently configured for the clean action.

で、もっかい

% fastlane test
# 中略
[13:40:55]: $ xcodebuild clean -showBuildSettings -scheme travis-ci-example -project ./travis-ci-example.xcodeproj
xcodebuild: error: Scheme travis-ci-example is not currently configured for the clean action.
# 後略

しっぱいする。

ビルド可能なschemeが無かった。

これで治った

supported_platforms': [!] undefined method `split' for nil:NilClass (NoMethodError)

なんとなく予想はつくので、Fastfileにて

  desc "Runs all the tests"
  lane :test do
-    scan
+    scan(device: "iPhone 7 (10.1)")
  end

とした

fastlane test 成功

% fastlane test
# ...略...
[18:39:51]: ▸ ✓ testPerformanceExample (0.253 seconds)
[18:39:51]: ▸   Executed 4 tests, with 0 failures (0 unexpected) in 0.519 (0.522) seconds
[18:39:51]: ▸
[18:39:51]: ▸ Test Succeeded
+--------------------+-------+
|        Test Results        |
+--------------------+-------+
| Number of tests    | 5     |
| Number of failures | 0     |
+--------------------+-------+

[18:39:51]: Successfully generated report at '/Users/otiai10/proj/ios/travis-ci-example/fastlane/test_output/report.html'
[18:39:52]: Successfully generated report at '/Users/otiai10/proj/ios/travis-ci-example/fastlane/test_output/report.junit'

+------+-------------------------------------+-------------+
|                     fastlane summary                     |
+------+-------------------------------------+-------------+
| Step | Action                              | Time (in s) |
+------+-------------------------------------+-------------+
| 1    | Verifying required fastlane version | 0           |
| 2    | default_platform                    | 0           |
| 3    | scan                                | 19          |
+------+-------------------------------------+-------------+

[18:39:52]: fastlane.tools finished successfully 🎉
%

良い感じ!

CIサーバのためにschemeをsharedにする

Product > Scheme > Manage Schemes > sharedのチェックボックス

f:id:otiai10:20161207025033p:plain

travis-ci用の設定ファイルを設置

みんなだいすき.travis.yml

language: objective-c
osx_image: xcode8.1
script:
    - fastlane test

Travis CIのコンソールでこのレポジトリのCIを有効にする

もちろんアカウントが必要。 https://travis-ci.org/

f:id:otiai10:20161207025750p:plain

いざpush

every pushでCIがまわるように設定しているので、この状態でpushすれば発動するはず。

[!] The Fastfile requires a fastlane version of >= 1.111.0. You are on 1.109.0. Please update using sudo gem update fastlane.

で、しっぱいする。

https://travis-ci.org/otiai10/ios-travis-ci-example/builds/181730714

どうやらローカルにインストールしたfastlaneが1.111.0で、そのfastlaneでinitしたFastfileなのでfastlaneのバージョン指定が1.111.0になっていたっぽい。これを以下のように変えた

-fastlane_version "1.111.0"
+fastlane_version "1.109.0"

 default_platform :ios

再度push!

https://travis-ci.org/otiai10/ios-travis-ci-example/builds/181803675

f:id:otiai10:20161207085238p:plain

やったー!

雑感

  • 参考にしたドキュメントだと、fastlane/travis.shとかいうのを噛ませて、ビルド発動条件をコントロールしてた
    • できるだけ.travis.ymlでコントロールしたほうがいいんじゃないかな
  • グローバルないしrbenvのlocalにfastlaneをインストールしてしまうと、今回のようにfastlaneのバージョン問題が起こりうる
    • Gemfileとbundle execで実行みたいな構成のほうがいいかと思われる
  • サードパーティのサーバ上ではiOSのビルドできないからMacにJenkins立てるしかない、みたいな偏見あったけど、気のせいだったのかな?
  • fastlane/Appfileやfastlane/certの設定次第ではデプロイもできる(はず、と思っている)ので、やってみたい

DRY

個人開発程度のOCRサーバならHerokuに立てればいいじゃない

追記 2018/07/26

このプロジェクトはDocker on Herokuに移行したので、一時的に「Deploy to Heroku」ボタンは動かなくなってます。Dockerでデプロイ可能なので、以下をご参考ください。

github.com

以下原文


このエントリはGo (その2) Advent Calendar 2016 - Qiitaの5日目です。
WETな方でもお世話になっております、otiai10です。

とある個人開発が、もうかれこれ3年ぐらい続いているんですが、ブラウザ上に描画されたちょっとしたテキストをOCR(文字認識)する要件があって、それをずっとさくらVPSPythonでやってましたが、3年もやってると、他の個人開発だったりとか、副業だったりとかでサーバリソースを一緒にしたくないなあ、っていうことが発生してきて、しかもべつに広告とかアフィとかで報酬が発生するタイプの個人開発でもないので、なんで俺が身を削って維持せなあかんねんという気持ちにもなったので、いいかげん、無料でOCRサーバ立てるのをやりました。Goで。Go好きなので。

tl;dr

Deploy

これ押したらもう立ちます。

特徴

  1. Google Cloud Vision API のように自由画像から文字座標を検出したりしない
    • 位置と矩形が確定している場合の文字認識に適してます
  2. Google Cloud Vision API では指定できないchar_whitelist(検出文字制限)ができる
    • 想定される文字が限られている場合に適しています
  3. 無料 ← つよい

みなさんバンバン自分のOCRサーバインスタンスを立てて、レシートを読むなり、アイドルのスタミナ回復時間を読むなりしてください。

やったことその1: GoでC++のライブラリを叩く

Goはcgoっていうのがあって、GoからC/C++C/C++からGoを呼べたりするんですけど、これを使って既存の光学文字認識ライブラリであるTesseract-OCRを呼んでます。

GitHub - otiai10/gosseract: Go package for OCR (Optical Character Recognition), by using Tesseract C++ library

例。includeしているtess.hは自作のヘッダファイルで、cppファイルが実際にTesseract-OCRを叩いてます。このGoファイルをビルドすると、C/C++のライブラリにリンクされた実行ファイルが手に入る、という寸法です。

package tesseract

/*
#cgo LDFLAGS: -llept -ltesseract
#include "tess.h"
*/
import "C"

// Simple executes tesseract only with source image file path.
func Simple(imgPath string, whitelist string,languages string) string {
    p := C.CString(imgPath)
    w := C.CString(whitelist)
    l := C.CString(languages)

    s := C.simple(p, w,l)
    return C.GoString(s)
}

やったことその2: せっかくなのでWAFっぽいものをつくる

僕がGoの好きなところのひとつは、DIY(Do It Yourself)感がすごいところで、始めやすいし、Write&Runが手軽だし、標準ライブラリが簡潔かつ充実してるし、釘一本からチェーンソーまであって、隅にはペットコーナーすらある的な、ホームセンターみたいな雰囲気が好きです。

ということで、最低限よくやるルーティングと、あとHTTPのフィルタリングあたりをやる小さなツールキットをつくりました。

GitHub - otiai10/marmoset: The very minimum web toolkit, less than frame work

func main() {
    router := marmoset.NewRouter()
    router.GET("/hello", func(w http.ResponseWriter, r *http.Request) {
        w.Write([]byte("hello!"))
    })
    http.ListenAndServe(":8080", router)
}

Viewのレンダリングもやるんですけど、なんかHerokuで動かなくて、アドベントカレンダー的に合わなかったのでocrserver側ではdirty hackしてます...

やったことその3: 1と2を、Uh...!合わせる

PPAPの画像をコラって貼りたいと思ったんだけど、ライセンスフィルタ付きで画像検索したら1個も無えの。

marmosetで小さいサーバをつくって、gosseractでOCRするところをやったのが、こちらになります。

github.com

やったことその4: Herokuデプロイできるようにする

なんかHerokuはbuildpackっていうのがあって、言うなればUbuntuベースのCedarっていうイメージをベースに、自分で好きな拡張をしていけるようになってるっぽい。

上記のgoseractは当然、GoのコンパイルにはTesseract-OCRのヘッダファイル/共有オブジェクトファイルが必要なので、これをHerokuインスタンスに配置して、サーバアプリケーションが立つときに参照できるようにしてやらないといけないんだけど、どうしようかな、と思ってたら直でaptitudeが使えるマジ神なbuildpackがあったので一発解決しました。

これがたぶん今回のミソでした。Tesseract-OCR叩くパッケージにも、webのツールキットにも、OCRサーバのUIにもまだまだTODOが多いので、使いながらブラシアップしていきたいです。

まとめ

Deploy ← これ押したらあなたのOCRサーバがもう立ちます。無料で。

個人開発、いいですよね。知らない技術に触れるチャンスになるので。

追記

現場からは以上です。

Dockerでホストのファイルをコンテナに持って行くメモ

というか、マウントである。

メモ

まず入って出れることだけ確認。--rmで終了時にコンテナも抹消する。

% uname
Darwin
% docker run -i -t --rm library/ubuntu
root@7f3902552705:/# uname
Linux
root@7f3902552705:/# exit
exit
% docker ps -a
CONTAINER ID        IMAGE               COMMAND             CREATED             STATUS              PORTS               NAMES
%

適当にホストにおいてファイルつくる。

% echo "田井中律は俺の嫁" > hoge.txt

カレントディレクトリをコンテナ内における/dataかなんかにマウントしつつコンテナを立ち上げる

% docker run -v `pwd`:/data -i -t --rm library/ubuntu
root@d02c8d9170a1:/# ll /data/
drwxr-xr-x  1 1000 staff      374 Dec  3 08:45 ./
drwxr-xr-x 35 root root      4096 Dec  3 08:47 ../
-rw-r--r--  1 1000 staff       25 Dec  3 08:42 hoge.txt
root@d02c8d9170a1:/# cat /data/hoge.txt
田井中律は俺の嫁
root@d02c8d9170a1:/# exit
exit
%

できた。 {ホスト内ファイルパス}:{コンテナ内ファイルパス}

DRY

UITableViewの左にある謎の余白を消したい

やることは3つ

  1. UITableViewのseparatorInsetをゼロにする
    • これはインターフェースビルダーからでも変更可能
  2. UITableViewCellのlayoutMarginsをゼロにする
  3. UITableViewCellのpreservesSuperviewLayoutMarginsを無効にする
func viewDidLoad() {
    super.viewDidLoad()

    // 1) TableViewのinsetをゼロにする
    reasonsTable.separatorInset = UIEdgeInsetsZero
}

func tableView(tableView: UITableView, cellForRowAtIndexPath indexPath: NSIndexPath) -> UITableViewCell {
    let cell = UITableViewCell()

    // 2) 自分自身のmarginをゼロにする
    cell.layoutMargins = UIEdgeInsetsZero
    // 3) superviewからmarginを引き継がない
    cell.preservesSuperviewLayoutMargins = false

    cell.textLabel?.textAlignment = .Center
    cell.textLabel?.text = self.reasons[indexPath.row].germanText
    return cell
}

Tesseract-OCRをソースからコンパイルする

コンパイルして、共有ライブラリとして読み込まれる.soファイルをつくれることを確認したい。APIファイル(.hとか)はReleases · tesseract-ocr/tesseract · GitHubを解凍すれば同梱されてる。ついでに同環境下でそのTesseract-OCRがちゃんと動くことも確認したい。

事前準備: Dockerで雑に使い捨て開発環境つくる個人的なメモ - DRYな備忘録

参考

ログ

root@f456604ccbed:/# cd
root@f456604ccbed:~# mkdir workspace && cd workspace
root@f456604ccbed:~/workspace#
root@f456604ccbed:~/workspace# wget https://github.com/tesseract-ocr/tesseract/archive/3.04.01.tar.gz
root@f456604ccbed:~/workspace# tar -zxvf 3.04.01.tar.gz
root@f456604ccbed:~/workspace# cd tesseract-3.04.01/
root@f456604ccbed:~/workspace/tesseract-3.04.01#
root@f456604ccbed:~/workspace/tesseract-3.04.01# ./autogen.sh
Running aclocal
./autogen.sh: 60: ./autogen.sh: aclocal: not found

  Something went wrong, bailing out!

root@f456604ccbed:~/workspace/tesseract-3.04.01# apt-get install -y autotools-dev
root@f456604ccbed:~/workspace/tesseract-3.04.01# apt-get install -y automake
root@f456604ccbed:~/workspace/tesseract-3.04.01# ./autogen.sh
Running aclocal
Running libtoolize
./autogen.sh: 65: ./autogen.sh: libtoolize: not found
./autogen.sh: 65: ./autogen.sh: glibtoolize: not found

  Something went wrong, bailing out!

root@f456604ccbed:~/workspace/tesseract-3.04.01# apt-get install -y build-essential libtool
root@f456604ccbed:~/workspace/tesseract-3.04.01# ./autogen.sh
Running aclocal
Running libtoolize
libtoolize: putting auxiliary files in AC_CONFIG_AUX_DIR, `config`.
libtoolize: copying file `config/ltmain.sh`
libtoolize: putting macros in AC_CONFIG_MACRO_DIR, `m4`.
libtoolize: copying file `m4/libtool.m4`
libtoolize: copying file `m4/ltoptions.m4`
libtoolize: copying file `m4/ltsugar.m4`
libtoolize: copying file `m4/ltversion.m4`
libtoolize: copying file `m4/lt~obsolete.m4`
Running autoheader
Running automake --add-missing --copy
configure.ac:321: installing 'config/compile'
Running autoconf

All done.
To build the software now, do something like:

$ ./configure [--enable-debug] [...other options]
root@f456604ccbed:~/workspace/tesseract-3.04.01#

autogen.shの成功

root@f456604ccbed:~/workspace/tesseract-3.04.01# ./configure
# 中略
checking for leptonica... configure: error: leptonica not found
root@f456604ccbed:~/workspace/tesseract-3.04.01# cd ..
root@f456604ccbed:~/workspace# wget https://github.com/DanBloomberg/leptonica/archive/v1.73.tar.gz
root@f456604ccbed:~/workspace# tar -zxvf v1.73.tar.gz
root@f456604ccbed:~/workspace# cd leptonica-1.73/
root@f456604ccbed:~/workspace/leptonica-1.73# ./configure
bash: ./configure: Permission denied
root@f456604ccbed:~/workspace/leptonica-1.73# chmod 755 ./configure
root@f456604ccbed:~/workspace/leptonica-1.73#
root@f456604ccbed:~/workspace/leptonica-1.73# ./configure
root@f456604ccbed:~/workspace/leptonica-1.73# make

root@f456604ccbed:~/workspace/leptonica-1.73# make install
Making install in src
make[1]: Entering directory '/root/workspace/leptonica-1.73/src'
make[2]: Entering directory '/root/workspace/leptonica-1.73/src'
test -z "/usr/local/lib" || /bin/mkdir -p "/usr/local/lib"
# 中略
----------------------------------------------------------------------
Libraries have been installed in:
   /usr/local/lib

If you ever happen to want to link against installed libraries
in a given directory, LIBDIR, you must either use libtool, and
specify the full pathname of the library, or use the `-LLIBDIR`
flag during linking and do at least one of the following:
   - add LIBDIR to the `LD_LIBRARY_PATH` environment variable
     during execution
   - add LIBDIR to the `LD_RUN_PATH` environment variable
     during linking
   - use the `-Wl,-rpath -Wl,LIBDIR` linker flag
   - have your system administrator add LIBDIR to `/etc/ld.so.conf`

See any operating system documentation about shared libraries for
more information, such as the ld(1) and ld.so(8) manual pages.
----------------------------------------------------------------------
# 後略
root@f456604ccbed:~/workspace/leptonica-1.73# ls -l /usr/local/lib/
total 22156
-rw-r--r-- 1 root staff 14116202 Nov  6 20:35 liblept.a
-rwxr-xr-x 1 root staff      943 Nov  6 20:35 liblept.la
lrwxrwxrwx 1 root staff       16 Nov  6 20:35 liblept.so -> liblept.so.5.0.0
lrwxrwxrwx 1 root staff       16 Nov  6 20:35 liblept.so.5 -> liblept.so.5.0.0
-rwxr-xr-x 1 root staff  8559120 Nov  6 20:35 liblept.so.5.0.0
drwxr-sr-x 2 root staff     4096 Nov  6 20:35 pkgconfig
root@f456604ccbed:~/workspace/leptonica-1.73#

leptonicaのコンパイルは完了

root@f456604ccbed:~/workspace/leptonica-1.73# cd ../tesseract-3.04.01/
root@f456604ccbed:~/workspace/tesseract-3.04.01# export LIBLEPT_HEADERSDIR=/root/workspace/leptonica-1.73/src
root@f456604ccbed:~/workspace/tesseract-3.04.01# ./configure
# 中略

Configuration is done.
You can now build and install tesseract by running:

$ make
$ sudo make install

You can not build training tools because of missing dependency.
Check configure output for details.

training toolsがうんちゃらと言っているものの、tesseractのconfigureは完了

root@f456604ccbed:~/workspace/tesseract-3.04.01# make
root@f456604ccbed:~/workspace/tesseract-3.04.01# make install
# 中略
----------------------------------------------------------------------
Libraries have been installed in:
   /usr/local/lib

If you ever happen to want to link against installed libraries
in a given directory, LIBDIR, you must either use libtool, and
specify the full pathname of the library, or use the `-LLIBDIR`
flag during linking and do at least one of the following:
   - add LIBDIR to the `LD_LIBRARY_PATH` environment variable
     during execution
   - add LIBDIR to the `LD_RUN_PATH` environment variable
     during linking
   - use the `-Wl,-rpath -Wl,LIBDIR` linker flag
   - have your system administrator add LIBDIR to `/etc/ld.so.conf`

See any operating system documentation about shared libraries for
more information, such as the ld(1) and ld.so(8) manual pages.
----------------------------------------------------------------------

tesseractのmake, make installも完了。確認する

root@f456604ccbed:~/workspace/tesseract-3.04.01# cd
root@f456604ccbed:~# ls -l /usr/local/lib/
total 137364
-rw-r--r-- 1 root staff 14116202 Nov  6 20:35 liblept.a
-rwxr-xr-x 1 root staff      943 Nov  6 20:35 liblept.la
lrwxrwxrwx 1 root staff       16 Nov  6 20:35 liblept.so -> liblept.so.5.0.0
lrwxrwxrwx 1 root staff       16 Nov  6 20:35 liblept.so.5 -> liblept.so.5.0.0
-rwxr-xr-x 1 root staff  8559120 Nov  6 20:35 liblept.so.5.0.0
-rw-r--r-- 1 root staff 87030250 Nov  6 20:45 libtesseract.a
-rwxr-xr-x 1 root staff      987 Nov  6 20:45 libtesseract.la
lrwxrwxrwx 1 root staff       21 Nov  6 20:45 libtesseract.so -> libtesseract.so.3.0.4
lrwxrwxrwx 1 root staff       21 Nov  6 20:45 libtesseract.so.3 -> libtesseract.so.3.0.4
-rwxr-xr-x 1 root staff 30937064 Nov  6 20:45 libtesseract.so.3.0.4
drwxr-sr-x 2 root staff     4096 Nov  6 20:45 pkgconfig
root@f456604ccbed:~# which tesseract
/usr/local/bin/tesseract
root@f456604ccbed:~#

まあたぶんtraineddataが無いのでtesseractコマンド自体は失敗すると予想される。今回の目的は「OSのパッケージマネージャを使わず、tesseract/leptonicaのヘッダファイルとコンパイル済み.soファイルの入手」だったので、とりあえず目的達成できたと思う。

番外: tesseractコマンドの挙動確認

root@f456604ccbed:~# export LD_LIBRARY_PATH=$LD_LIBRARY_PATH:/usr/local/lib
root@f456604ccbed:~# tesseract --list-langs
Error opening data file /usr/local/share/tessdata/eng.traineddata
Please make sure the TESSDATA_PREFIX environment variable is set to the parent directory of your "tessdata" directory.
Failed loading language 'eng'
Tesseract could not load any languages!
Could not initialize tesseract.
root@f456604ccbed:~#

予想通り、eng.traineddataが無いと言われる。

root@f456604ccbed:~# mkdir -p data/tessdata
root@f456604ccbed:~# wget https://github.com/tesseract-ocr/tessdata/blob/master/eng.traineddata?raw=true
root@f456604ccbed:~# pwd
/root
root@f456604ccbed:~# mv eng.traineddata\?raw\=true /root/data/tessdata/eng.traineddata
root@f456604ccbed:~# export TESSDATA_PREFIX=/root/data
root@f456604ccbed:~# tesseract --list-langs
List of available languages (1):
eng
root@f456604ccbed:~#

traineddataの配置と認識確認できた。

root@f456604ccbed:~# cd
root@f456604ccbed:~# wget https://cloud.githubusercontent.com/assets/931554/20041852/bda107d4-a46f-11e6-8c49-6d022007e445.jpg -O sample.jpg
root@f456604ccbed:~# tesseract sample.jpg stdout
Error in pixReadMemJpeg: function not present
Error in pixReadMem: jpeg: no pix returned
Error during processing.
root@f456604ccbed:~#

むむ。

stackoverflow.com

Leptonicaを入れる前にlibjpegを入れる必要があったっぽい。このへんでもう別コンテナで仕切り直したいな、という気持ちがある。

root@f456604ccbed:~# cd /root/workspace/
root@f456604ccbed:~/workspace# wget https://github.com/LuaDist/libjpeg/archive/8.4.0.tar.gz
root@f456604ccbed:~/workspace# tar -zxvf 8.4.0.tar.gz
root@f456604ccbed:~/workspace# cd libjpeg-8.4.0
root@f456604ccbed:~/workspace/libjpeg-8.4.0# configure
root@f456604ccbed:~/workspace/libjpeg-8.4.0# make
root@f456604ccbed:~/workspace/libjpeg-8.4.0# make install
# 中略
----------------------------------------------------------------------
Libraries have been installed in:
   /usr/local/lib

If you ever happen to want to link against installed libraries
in a given directory, LIBDIR, you must either use libtool, and
specify the full pathname of the library, or use the `-LLIBDIR`
flag during linking and do at least one of the following:
   - add LIBDIR to the `LD_LIBRARY_PATH` environment variable
     during execution
   - add LIBDIR to the `LD_RUN_PATH` environment variable
     during linking
   - use the `-Wl,-rpath -Wl,LIBDIR` linker flag
   - have your system administrator add LIBDIR to `/etc/ld.so.conf`

See any operating system documentation about shared libraries for
more information, such as the ld(1) and ld.so(8) manual pages.
----------------------------------------------------------------------

で、もっかいleptonicaのmakeをする

root@f456604ccbed:~# cd /root/workspace/leptonica-1.7
root@f456604ccbed:~/workspace/leptonica-1.73# ./configure
root@f456604ccbed:~/workspace/leptonica-1.73# make
root@f456604ccbed:~/workspace/leptonica-1.73# make install

これでどうや

root@f456604ccbed:~/workspace/leptonica-1.73# cd
root@f456604ccbed:~# tesseract sample.jpg stdout
Error in pixGenHalftoneMask: pix too small: w = 173, h = 64
otiai’lO / gosseract

root@f456604ccbed:~#
f:id:otiai10:20161107062656j:plain

これが

f:id:otiai10:20161107062807p:plain

よっしゃ!

これで、OSのパッケージマネージャを使わず、make/make installでTesseract-OCRが動く環境を確認できた。

DRYな備忘録として